Showing posts with label Crafts. Show all posts

Friday, July 4, 2014

4th of July!

First off, Thank you to anyone who has served in the military to help make this country what it is, and for keeping us FREE!

We had so much fun getting ready for today!  The kids loved every minute, and kept asking what was going on! Easiest way to explain it to a 3, 2, and 1 year old-tell them it is America's Birthday!  They were so excited about a birthday party, and this made for even more fun getting ready for today.

What we did:

Made 4th of July T-shirts! They LOVED playing with paints! They were so excited to watch these dry, and then to get to wear them today!

*These are super easy to do-just remember to put cardboard between the shirt layers-My preggo brain forgot that step at first, but lucky for us remembered before they were totally finished! This idea came off of Pinterest-gotta love that site!

We made all kinds of "special treats" to enjoy:

Marshmallow Pops!
Firework candy!
Dipped Ice Cream Cones!
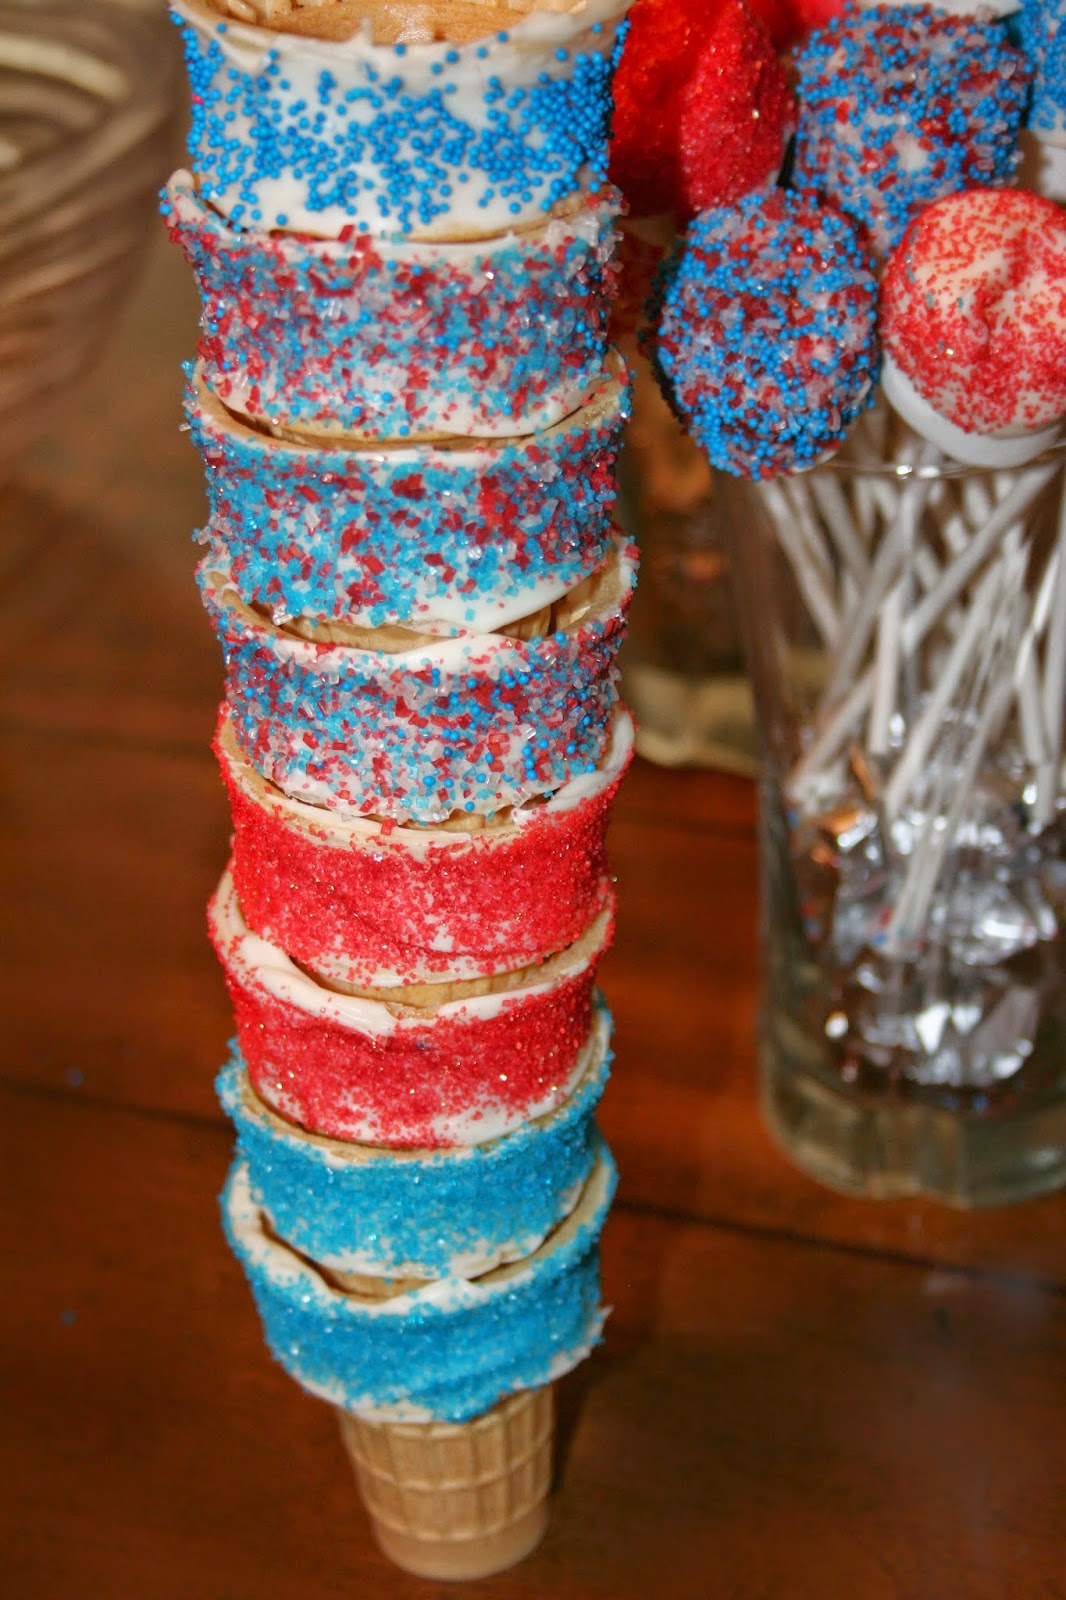
Fruit Ice Cubes for our Sparkle Water!

Breakfast:
Red/White/Blue yogurt! My children would live off of yogurt if I would let them!
 *Don't forget the Ice Cream Cones that my children decided to eat before we got out of bed!  We knew it was just a little too quiet upstairs. They were ever so kind though, and did share one with Avery.  AND brought us each one as breakfast in bed!  I didn't have my camera or I would have taken a picture of them and their blue and red covered faces.
 Lunch:
Loaded Potato Salad!
Bacon Wrapped Corn

Rodeo Blue Cheese Burgers!

Star Shaped Watermelon!
 
Flag Fruit Salad!

I have no idea what is for dinner. We are still full from lunch! They got to spend the morning outside with their daddy while he got the lawn mowed-it was starting to look like we lived in the wilderness!  We ALL got a good afternoon nap in! And now we are off to have even more fun doing who knows what.  We LOVE when daddy can be home with us all day!


Who knows we may even be able to make it to the fireworks tonight-depending on how the children are acting!

Happy 4th of July from the Turley Clan!!


Tuesday, July 23, 2013

Toothbrush holder

Another frugal treasure that I love!  A toothbrush/hand towel holder! For the down stairs bathroom...
 
I had a piece of wood so we cut it in two.  A long piece for the back and a short piece for the shelf.  I couldn't tell you dimensions because I just marked where I wanted it cut based on how big I wanted it to look, sorry.  Just make some up, sometimes it works best that way.

I screwed the two pieces of wood together.
I added a bracket to the back so we can hang it on the wall. 

Painted the whole thing a thin coat of white.  I then added a door knob, just like the ones on my towel rack underneath the small shelf.  This will be to hang our hand towel on!

The small shelf is for our toothbrush holder.  I found a cool looking wine type glass for $1 at a garage sale and knew I wanted it to be my toothbrush holder, so I hot glue gunned it to the top of the shelf and it has held up marvelously.  As far as it hasn't fallen off yet!

The total cost of this project was $1.50.  It was 50cents for the knob and $1 for the glass, I had the wood, paint, and bracket!

Tuesday, July 16, 2013

Towel/Robe Rack

At the wonderful Reuse It Center again...found some beautiful treasures!

I found a nice piece of worn out wood along with it I found some old white cabinet knobs...
We now have a towel/robe rack for our new bathroom-whenever we decide to finally finish it!
This was an amazing piece of wood because it already had holes drilled into it, so I just had to screw the knobs on and then attach 2 brackets(I think that may be what they are called, pictured below so you know what I'm talking about) to the back so we can hang it from the wall. 
This wonderful piece was $4 total and took me maybe 20min tops to complete. Pure awesomeness!

Wednesday, December 28, 2011

Boa Scarf

I decided to make a boa like scarf out of some extra yarn that I had for my little step-sister to be able to play dress up with.

I skein Fun fur type yarn (now I took my one end for the inside and my one end from the outside and knit them together to make it a bit thicker so that the needles holes didn't show through and it made it a bit fluffier and more boa like!)
Size 5 knitting needles

CO 8
Knit until it is the length desired
Bind off

There you have it simple as that, and cute too if I must say so myself.

Tuesday, December 27, 2011

Chuggington Train or Car

I made this adorable train out of Felt, and I had so much fun!! We gave it to one of our second cousins for Christmas.

1.5yds of Red Felt (or color of your choice)
.5 yds of Black Felt
.25 yds of White Felt

First, I cut out the shape of the side of the train, I guessed with this as I only had a picture off the Internet to go by.  I cut out two of these pieces.  I then cut a long piece of felt 6" wide and about 32" long to attach to these as the middle piece.  I also cut out all the wheels, I used one of the covers for my little man's bottles since they were bigger and a perfect circle.  (I put 4 wheels on each side, so that was 16 circles that I cut out of the black felt).  I also cut out some black pieces to attach the wheels to the train, I used the parts between the circles that were left on the felt.

Next comes the sewing and there is quite a bit of it just a heads up.  I sewed two of each circle together, so I could lightly stuff them, so leave a small opening so you can add some stuffing.  Once I filled them, I sewed up the last little bit by hand.  If you are making a train you don't want them too big as trains don't really have thick wheels.  If you are going to use this idea to make a car, then stuff them full and you may want to make the circles a bit bigger.


For the main part of the train you are going to always keep the long piece straight, DON"T TURN IT, only turn the shape of the train.  I started half way on the bottom of the train and started sewing.  Now remember when you get the the corner, just move the foot of the sewing machine up and move just the shape of the train so that it lines up nice again. Below is a picture, but it is kind of hard to show in picture form.
When you are all done with that one side the train should look like this. Now the middle, straight part looks funny but that is because it is standing up on it so you could see the train shape. Looks pretty good!
Next, you are going to take the other side of the train and pin it to the straight piece.  Make sure you line these up correctly or you will end up with a  really funny looking train.  The hardest part is probably making sure everything lines up good.  Then sew that side. Oh I forgot to mention earlier I used 1/4 in seams, sorry about that. This is what it should look like when both sides are done!
Now if you notice at the bottom you should have a hole left where the two ends come together, this is intentional, as now we are going to stuff it, so it maintains the wonderful shape.
Before you stuff it tuck in those ends a bit so that when you sew it up it is a bit easier and you don't have to try and jam them in there with the stuffing.  Just a hint!

 Now you are going to sew up that seam.  I used black thread here, so you could see it a little bit easier.
You now have the base of your train all finished.  So here comes the fun part, attaching all the decorations. Because this is a cute train, I made a face for it out of white and black felt pieces.  I then also made the side decorations. (I put all of these on before attaching the wheels so I knew where to place the wheels).  You can attach these by either hand sewing on all the pieces or you can hot glue them on.  I used the hot glue, and then I put the wheels on by hand sewing because I wanted those to be a bit more secure.

Pretty cute huh?
For the wheels, I first sewed the spacer(I don't know what to call the thing that connects the wheels together so we are going with that since it is an easy word) to one wheel and then to the other.  Do this for all the wheels so you could have two wheels connected to each spacer.  I then hand sewed them on to the train evenly spaced on each side so they matched.
I think it turned out quite nice for a first attempt at something like this.  I was really pleased with the outcome and I think he was too.


Here are both of the trains that I made, with the book that he got!

Monday, December 26, 2011

Tutu

I made my adorable little sister a tutu for Christmas since she loves to play dress up!

All you need is
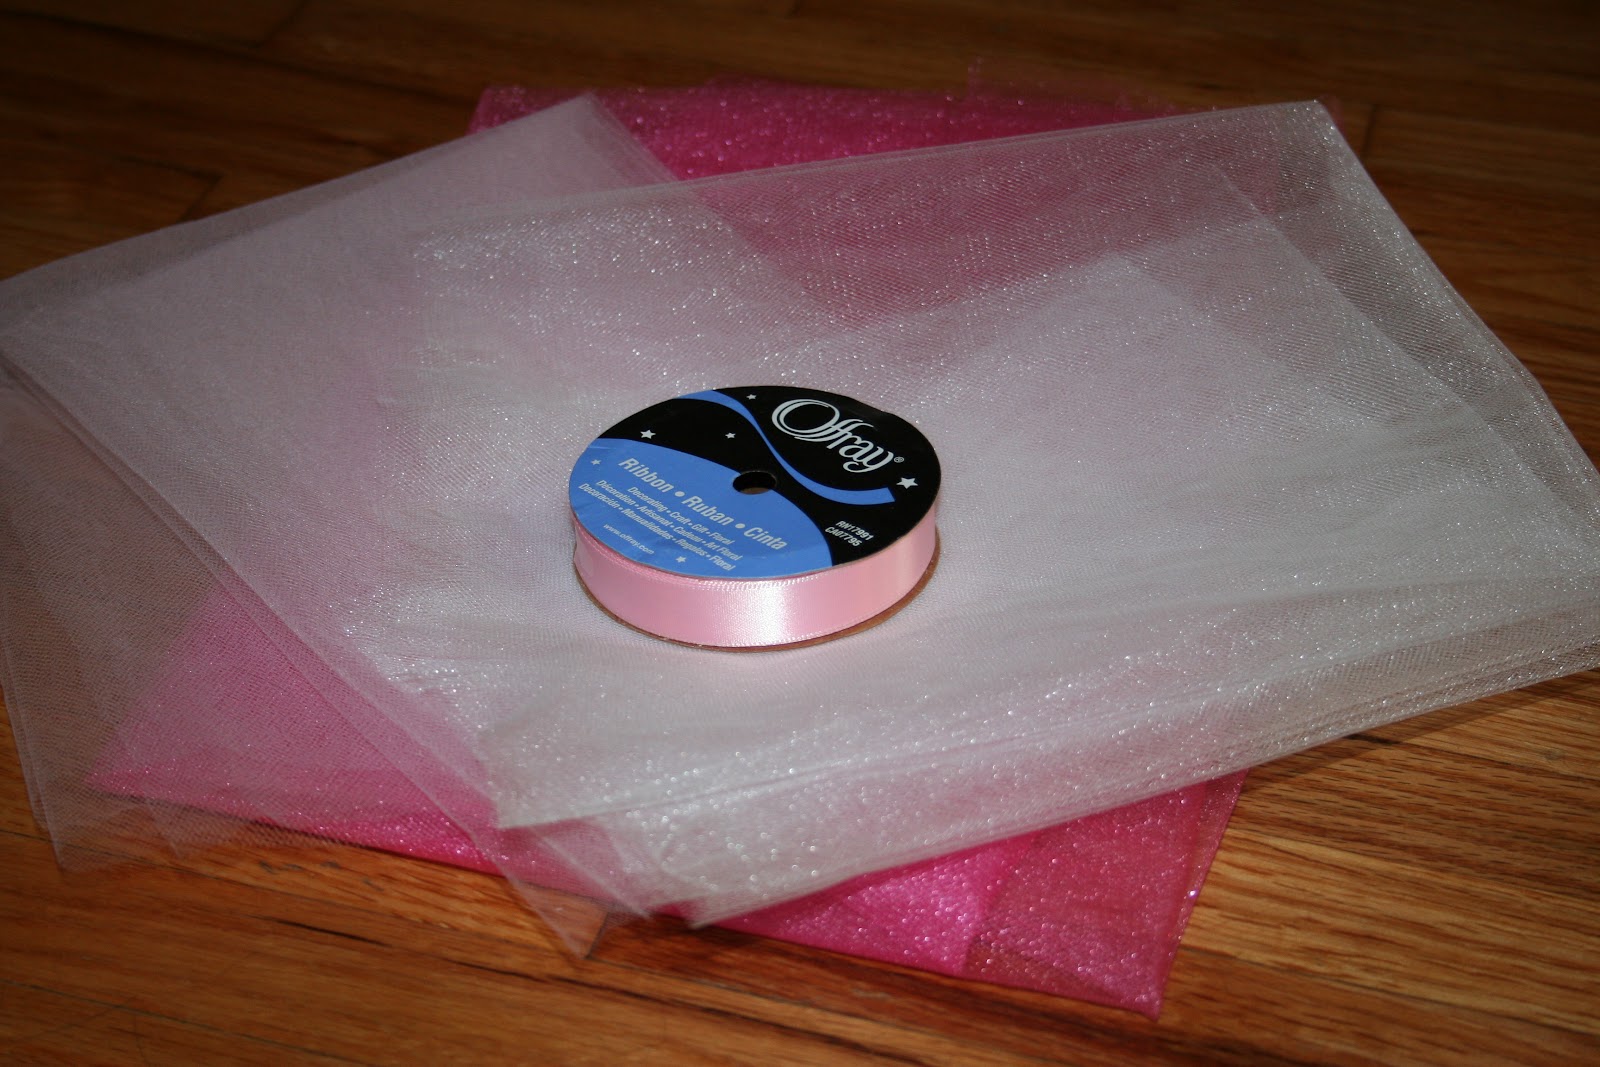
Ribbon- 60inches
Tulle- 1.5 yds light pink, and 2 yds hot pink

Cut the Ribbon to 60 inches.  Tie a knot 20in in on each side.  The section between the two knots is where you are going to tie all the tulle to the ribbon.  Then you have two long ends to tie together around the waist.


Lay the tulle out so that is has the natural fold (just like it does when it comes off the bolt), roll up from the folded side so that it is a long roll. 


Cut the tulle every three inches,  Then you unroll them all and cut them all in half.  Take the strips of tulle, fold them over the ribbon and make a knot, around the ribbon. Continue this until all of the tulle is used up.  I then spread them out slightly along the ribbon.  This makes a very fluffy skirt!

Sunday, December 25, 2011

MIttens-Adult

Home spun yarn (blue) -Color A
Fun fur yarn (cream) -Color B
Angel Hair yarn (grey) -Color C
Size 6 knitting needles
I used the yarn that was left over from making the scarf to make the mittens so I did not buy any additional yarn

CO 12 in color A
Row 1: knit 2, purl 2 (repeat pattern until end of row)
Row 2-8 Repeat row 1, so you have a nice ribbed effect for the cuff of the mitten
Row 9: In color B knit row inc in the first and last st knitting all stiches between
Row 10: Purl
Row 11- : Repeat rows 9&10 until you have 22 st on needles, end on inc row, don't purl yet
Purl 10, place stitch marker on needle, purl 2, place stitch marker on needles, purl rest of row
Knit 10, move st marker, inc 1 in the nxt 2 sts, move st marker, knit 10
Purl
Knit 10, move st marker, k1, inc 1 in nxt 2 sts, k1, move st marker, knit 10 Purl 10 (move to stitch holder), remove st marker, p6, remove st marker, slip last sts onto a different st holder
*You should have 6sts on your needles with those stitches you are going to Knit row, Purl row until it is long enough to encase your thumb.  I did a total of 6 rows.
Decrease on the 7th row by k2tog, k1, k2tog, k1
Thread yarn through remaining stitches, and sew up the side seam of the thumb.

From the second stitch holder, purl all stitches back onto the needle, the add on the stitches from the next needle holder by purling them all onto the needles.  It should look like the picture above, when all the stitches are back on the needles.
Knit row
Purl row
In Color C:
Knit row
Purl row
Repeat the two rows until you have 6 rows
In Color A:
Knit row
Purl row
Knit row
Purl row
*Now we are going to start decreasing to form the top of the mitten- If you have larger hands then knit and purl a few more rows before you start to decrease. These mittens when finished look long and skinny, but they fit wonderfully as the yarn forms to your hand, just an fyi
Knit 2tog, k4 (repeat until end of the row)
Purl
Knit 2tog, K4 (repeat until end of the row)
Purl
Knit2tog, K2 (repeat until end of the row)
Sew yarn through the remaining stitches, and sew up all the side seams.

There you have it some nice warm mittens!


Scarf

I decided to make this for a Christmas present. Don't tell it was really easy to make and quite inexpensive since it was made up of left over yarn that I had.

I used 6 different colors of yarn so it is really up to you what type you would like to use.
Size 11 knitting needles

CO 20 st (in 1st color)
Knit  row
Purl  row
Repeat until you have 7 rows ending in a Knit row
Color 2
Purl row
Knit row
Color 3
Purl row
Knit row
Repeat until you have 6 rows
Color 4
Purl row
Knit row
Repeat until you have 4 rows
Color 5
Purl row
Knit row
Repeat until you have 10 rows
Color 6
Purl row
Knit row
Repeat until you have 6 rows
Now you are going to repeat the pattern of all the colors, but your color 1 from now on will be 8 rows so you come out even and ending on a knit row each time. Just do this until it is long enough for your liking.  I did this pattern 4 times, and it is the perfect length for me. Bind off, and sew in all the edges.

Stay warm!

Monday, December 12, 2011

Containers

I love the way that the frosted containers looked, when they have the names etched on them such as flour, sugar, and so on.  But I am way too cheap to spend the money on them.  So I bought a 4 piece set of containers on sale for $12, much better than the normal $25 or higher.  I then also got a can of frosted glass spray paint-this was also on sale for $3, and I'm sure I will find some other uses for this great new friend! Got out some of my scrapbook stickers and got to work. 

First I put the letters onto the container to spell what I wanted to label them as. 

Second I taped off a box around the letters and then put newspaper all around it so that it would not spray the rest of the jar.

Third, I sprayed the jar with the frosted glass spray paint.

Forth, when the paint was still a bit tacky I removed the letters and allowed it to finish drying.

Fifth, I enjoyed my new project.  Just what I wanted at a much lower cost.


I only labeled two of the jars, one flour and the other sugar.  As I am not quite sure what I want to put in the other two, but am content with them having no labels.  I just wanted some nice containers to put on my kitchen counter once my kitchen is finished!

Thursday, August 25, 2011

Beach Bag

So we were headed to the lake with the youth from church, and of course we could not find a bag that was big enough to fit everything that we needed to bring. May I just say that our beach towels are those nice oversized ones, great for lounging on the beach, not so great for trying to fit in any normal sized bag.  After doing several tries in other bags that we had around the house I decided to check my scrap fabric pile to see if I could find any peice possibly big enough for a new beach bag...and I did YEAH!


So I took the whole scrap piece of fabric and folded in it half so that it would be a bit thicker so it could stand the weight of everything.  I then looked for some other scrap pieces so I could make some pockets on the inside (I love pockets and lots of them, I don't like when things just float all over the place).  So I cut out some scraps and sewed all the edges so they looked nice, and pinned them into place.  I unfolded the big piece so you wouldn't be able to see the pocket stitchings from the outside and placed my pockets onto the fabric.  With the small polka dot fabric I also sewed vertically right down the middle and it is the perfect size for a wallet and a cell phone so they don't get lost in the mess of everything else.  On my tall skinny pocket I actually sewed the bottem and two sides together and then just sewed the top seam under so that is was open still.  This turned out to be a great idea because then when I attached it to the bag I know had 2 long pockets perfect for sunscreen, hair brush, hand sanitizer, lotion, and a small bottle of aloe.  The last pocket I made was the big pocket.  I made this pocket specifically for the bathing suits so we didn't have to dig through the huge towels to have to find them.  It worked out perfectly.  I then folded the fabric in half again, so it was the size that I wanted it.

 I cut out some fabric to make some straps for the bag. To make the straps I just cut the fabric about 3.5in in width and the whole length of the fabric.  Once it was cut out I put the right sides together and sewed up the side.  I did not bother to sew up either end as they would be inside the bag seems so you would never know they were not finished. I then turned them so they were right side out and ironed them so they would stay flat.  (the picture was taken before the ironing)

SO before I added the straps to the bag I turned the fabric so the insides were facing out and I sewed up both of the side edges.  Note:  I did not need to sew the bottom of the bag since I just folded it in half, it made for a nice short cut.  I then pinned, along the top of the bag, where I wanted my straps.  I folded about 1/4 in of the fabric in so that I had nice straight edges and sewed in up all around the outside (be careful that you are sewing one side up at a time or you will sew the bag shut, which won't do you much good).  After that I turned it right side out and look a great beach bag and it took me about 1.5 hrs to make, this included all the ironing and the hunting of the fabric.

My finished bag worked amazing.  It held three swim suits (one pint sized on), snacks, two oversized towels, one baby towel, sunscreen, and personal items.  Not too bad for a last minute project and it held up super well with all the weight.  Very proud of it and I'm sure it will have many more uses as I am always in need of a good sized bag to haul things around in.