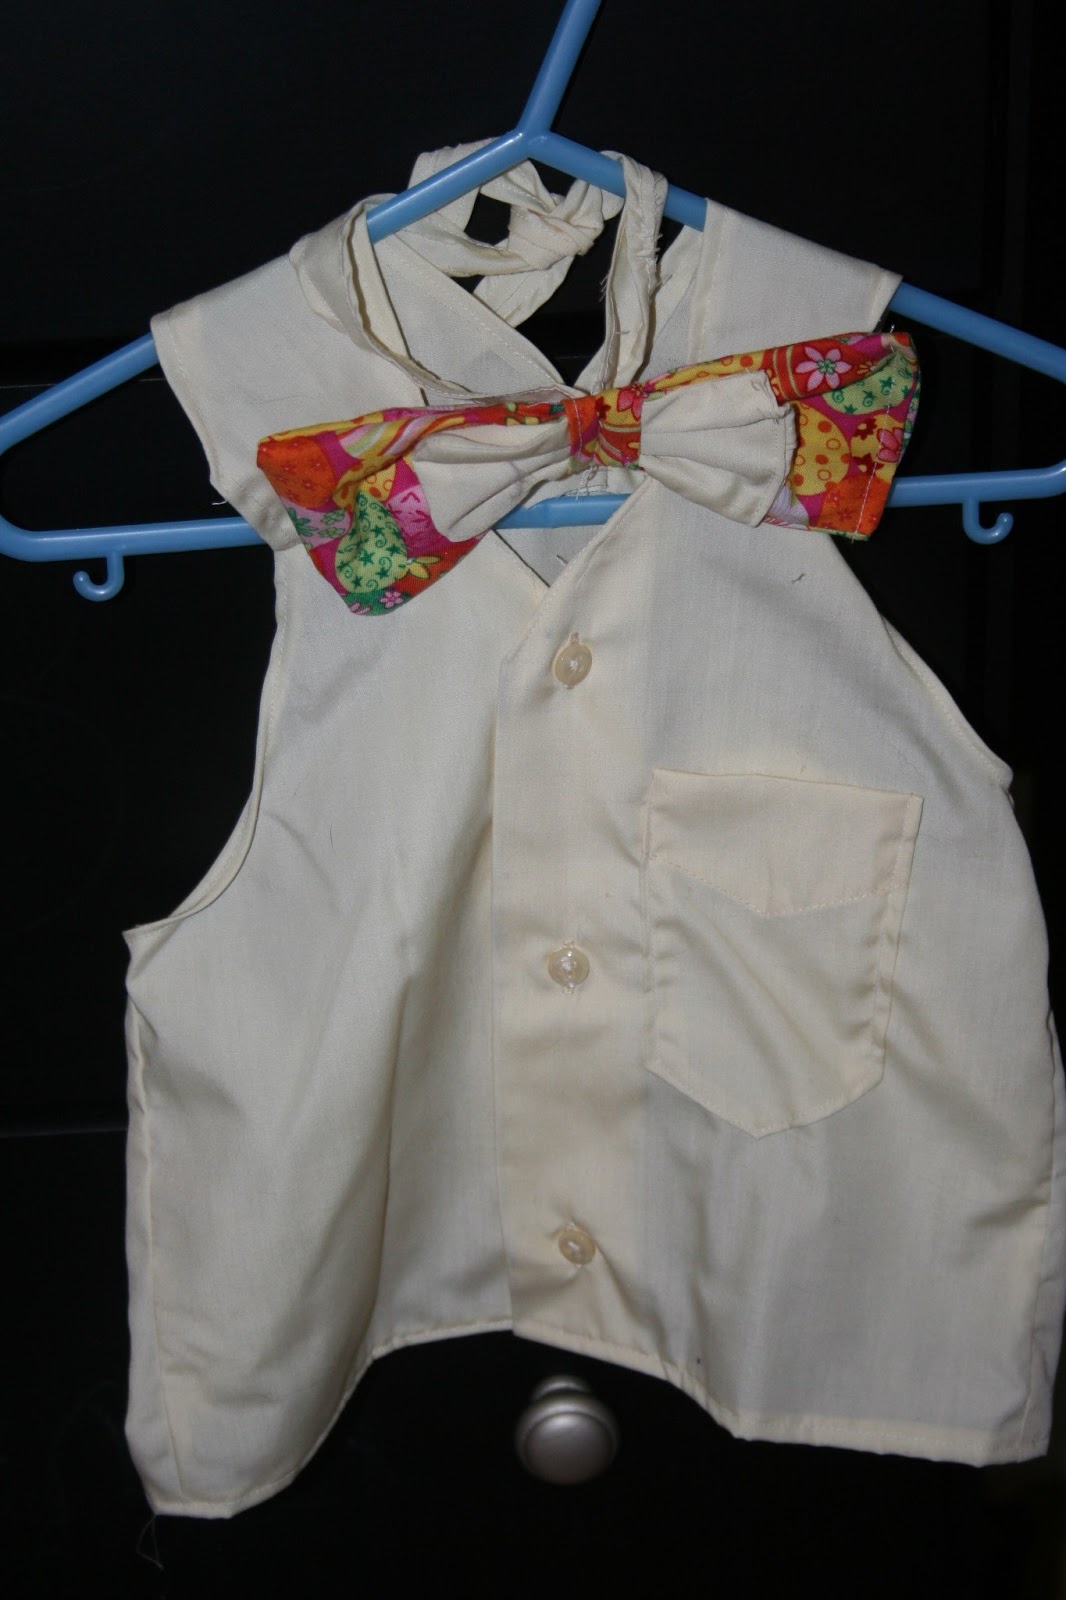
This post is really early or really late ;) I think we all know which one, but I am going to go with early for next Easter in case you want to make one for your kiddos-or maybe you can use it for Christmas? I took one of Greg's old dress shirts(that don't fit him any more), and got to work on making the kids Easter outfits. I was able to get a vest for my little man and a dress for my sweet girl! I loved them and think they looked adorable, what do you think? Also, 2 apologies while writing this post-lack of pictures(so very sorry for this one, as it can get hard to explain without pictures), and long post and I'm putting everything into one post(since it is so late) instead of separate posts for each item!
Double trouble!
Big boy!
Sweet girl!
Flower for Headband Tutorial:
This was the flower that we clipped onto Athaiah's head band!
First, cut out 6 circles that are fairly big in size, I used my big cups as a guide. (this is the patterned fabric in the background of the flower). You will need one more circle that is the same size, you can use a pattern if you like, I just used the plain yellow for this one. You will also need 6 circles(the pale yellow pictured above) in a smaller size as these ones will go on top of the bigger(patterned ones).
Next, you are going to fold all of these up in half so they are now a semi-circle, and them fold them over again so they make a triangle shape(like above)-I apologize for the lack of during pictures, it makes it hard to follow. Put a small amount of hot glue on the end to hold them together and keep them folded.
Arrange them on the big circle that you cut out and didn't fold. Put the point sides in the center so that it makes a circle. Hot glue them onto the big circle. If you would like you can put buttons or any other decoration at the center of the bow! I used buttons off the shirt sleeves since they were small and extra pieces of the shirt, (the pale yellow fabric was fabric from the sleeve of the dress shirt, I was making sure not to waste anything I could use!)
Hot glue the big circle now to an alligator clip so you can clip it on a headband or whatever you like, or so you can just pin it directly to their hair(If your little girl is lucky enough to have hair unlike mine!)
Dress Tutorial:
Take the dress shirt, and line a current dress up with the dress shirt across the bottom and center it. You want to make sure that the dress is centered so you can have the dress button down the front and you want it to button in the middle not on the sides.
With everything lined up correctly-make the skirt part of the dress a little bit bigger so that you can gather it(if you don't want the waste gathered at all just add extra for the seam allowances(1/2" on each side). Then cut out the dress pattern. I made a separate part for the top and bottom-this was so that I could gather it so it would have more of an A-line shape and so it wasn't so boxy looking. Just a personal preference. If you are cutting it into two pieces instead of one just make sure that you add extra to the bottom of the top piece and the top of the bottom piece for seam allowance. Also make sure the top part will fit perfectly and cut the top part of the bottom piece wider than you want it so you are able to gather the fabric! (I hope that makes sense, I'm sorry I know it would have helped a lot more if I had pictures to help explain things)
Sew up both sides of the bottom piece, and the top piece. To do that put the right sides of the fabric together and sew up both sides, so the seam will remain on the inside of the dress. You are going to also sew up the neckline seam. I use a zig zag stitch because that is what I like and I don't have a serger currently(maybe one day) To sew up the neckline just make sure you tuck about 1/4" under and sew it up so it is nice and smooth. I used a rounded neckline just because! Just make sure you don't sew it closed! I had to watch out on that part honestly because I almost did!
Last part is to sew the top and bottom pieces together. IF you made it all one piece congrats you are done-Easy right? Put the right sides of the fabric together and get to pinning, this is to gather it by hand so you don't have to do a gather stitch and then sew it up again. I like less sewing if possible. Make sure that you are again keeping the front part where it buttons open(if you like it that way), and sew the two pieces together. Congrats you are done! I added a bright pink ribbon to it(not attached, just tied it on) just for a pop of color since it was such a pale yellow shirt! Your done with the girly stuff, now onto what to make if you have a little man!
The BOW TIE: (My favorite part)
Ok, bow ties are super, super easy-are you ready for it? You cut out a rectangular shaped piece of fabric(make it double the size you want length wise because you are going to fold it in half). So if you want a bow tie that is 5" wide and 2/5" tall. Cut the piece of fabric 11" wide and 3" tall.(the extra is your seam allowance!) Fold it together with the right sides facing. Sew up 3 of the sides. Turn it so it is right side out, and sew up the last side. This bow tie has 2 layers so then do this again, but make it a couple inches shorter!
For the knot- You are going to cut a piece of fabric 1"x1.5", hem the sides so they don't look rough. Then sew the two ends together so that is makes a circle!
For the strap- Cut a piece of fabric a couple inches longer than your child's neck so you can tie it in the back(or if you like you can put a snap on it) Hem the edges so they look nice and finished. Attach this to the back of the knot-I hand stitched it on because I had already sewn the knot closed.
Assembly- Stuff the two rectangles into the knot(circle), Adjust the rectangles so they look how you want them to. I then ran it one time thru the sewing machine to hold it all together. BUT you don't have to do that part. My little one is 2 though and can play rough, I just didn't feel like taking a gamble that it would stay all together if he was pulling on it!
The Vest:
Take the leftover piece of your shirt. Make sure this is the top half of the shirt! OR if you are only making a vest you really can use whatever part that you want. I used a different vest that he already had for the template(makes it easier that way). Cut out all around the template leaving room for seam allowance. Sew up both sides by putting the right side of the fabric together and sewing it up! I then removed the pocket off of the shirt, cut it down to size and placed it on the vest! For the neckline, just tuck about 1/4" of fabric down and sew it all up so it looks nice and even! Do the same for around the arm holes. And there you go- A super simple and easy vest!
All of this was made out of 1 dress shirt. A bonus it was one that no longer fit my husband, which means it was free! The best way to do things!