Showing posts with label redone. Show all posts

Wednesday, April 18, 2012

Dog Bed

I made this quite a while ago, but now that I know how much he liked it I decided to post it.
Our dog and our two cats used to all sleep in our bed.  Can you say a little too crowded?  We now shut the door at night to keep the cats out, but our dog cried all night long and caused us not to sleep so we let him sleep in the room.  We just needed to figure out a way to keep him off the bed.
Let me preface this by saying he had a dog bed when we first got him, and he was so scared all the time he was constantly peeing on it, so I threw it out figuring it was doing more harm than good in the long run.  With that said I didn't want to go and spend another $20 on a dog bed. (we have to get the big kind since we have a chocolate lab).
As I was making the bed one day I noticed how torn up our mattress pad was getting so I came up with this idea!

I cut all the elastic off the sides of the mattress cover and snipped all the corners so that it would lay flat.  I then found a fleece blanket of mine that I used in high school on my twin bed-which doesn't fit our queen now I just never threw it away because it was soo comfy and it was purple my favorite color.
I then folded the mattress pad so that it was 1/4 of the size(this because my stuffing for the dog bed).  Then I folded the fleece blanket in half around the mattress pad, tucking in all the edges so the seams were nice and neat.  Sew all this together(I had to sew slow as it was really thick).

Guess what you are done.  My dog sleeps on this every night! I never thought we would be able to get him out of the bed.  I think it helped that it had our smell on it from being an older blanket.  Now when we go downstairs he goes straight for his bed, and it hardly took any training at all! (by training I mean that it took us two days of telling him to get off the bed, and when he got off the bed he went straight for his new dog bed).  Made me feel like doggy mom of the year, that is since he likes it so much!

Friday, March 30, 2012

Chair Cover

With everything getting moved around and being in a new place, my one cat gets finicky.  Needless to say how she usually repays us is by peeing on something.  So of course she picked my Ikea chair to pee on because we have one no where near us to be able to get a replacement cover at.
We decided to make one since we just finished the basement.  I really wanted some red down there, but not too much.  A chair cover was the perfect place to add some pops of red!

We found these super soft sheets on sale at Walmart and since a couple things needed recovering you will probably see this same design pop up in a lot of places.  But I like things to match so I have no problem with that!
I am not going to give you measurements because if you decide to recover something yourself it will probably be a different size.  This will just give you the basics on how to do it.
Part 1: Measure the top part (where your head rest).  Cut the fabric to that size(adding some for seam allowance).  I then had some old batting I put in there to make it fluffy since this is the head rest of the chair. Sew all this up making sure to sew the batting into the seams so that it stays and doesn't move around when you wash it.  Also make sure the right sides of the fabric are together and the batting is on one of the back sides.  I then place batting side down on the sewing machine so the needle doesn't get stuck in it.  I have some batting spray so I sprayed this on the fabric to make sure it sticks(it is like a glue for fabric and batting). Set this piece aside.

Part 2. I measured the second part of my cover, and cut that about 3 inches longer than needed.  I did these because I needed some room for seam allowance and also to sew the other two pieces to this one piece.  I then followed the same steps as above.  I placed the batting on one of the wrong sides and put the fabric right sides together.  Make sure you don't sew it all the way around so you have room to pull all the fabric through.  I left the whole bottom open as I was not quite sure how I was going to attach it to the other pieces yet, and needed to come up with a way to put the foam back into the chair.  I didn't really want to do a zipper not that it's hard I just didn't want to have to go and buy one, too cheap for that! 

Part 3: Same as the last 2 parts.  Measure and add room for seam allowance and some extra so you can attach it to the middle piece.  I added 2 inches to this one from the original measurement.

Part 4: Now we are going to attach all these pieces together and close up all those last seams.  I was still deciding how I wanted to do this in the process because I wanted to make sure I could remove the cover if it needed washing and then I wouldn't have to wash the foam pieces that go inside of it.

I attached them with some the top side of the fabrics sewn together-the parts that would be touching once on the chair.  I sewed this with about a 1 inch seam and I sewed about 1/4 of an inch in on either side just to make it lay flat and look nice.

Now all that is left is the back side of the chair cover which is left open.  I decided to put some snaps on this side so I can easily remove the cover if it needs washing.  So I attached three snaps-they are the hammer in kind and they work great! Last we stuff the foam back into the chair, and snap it closed and you are done!

It looks really nice and really adds a nice touch to the basement. The cat likes it:)

Tuesday, March 27, 2012

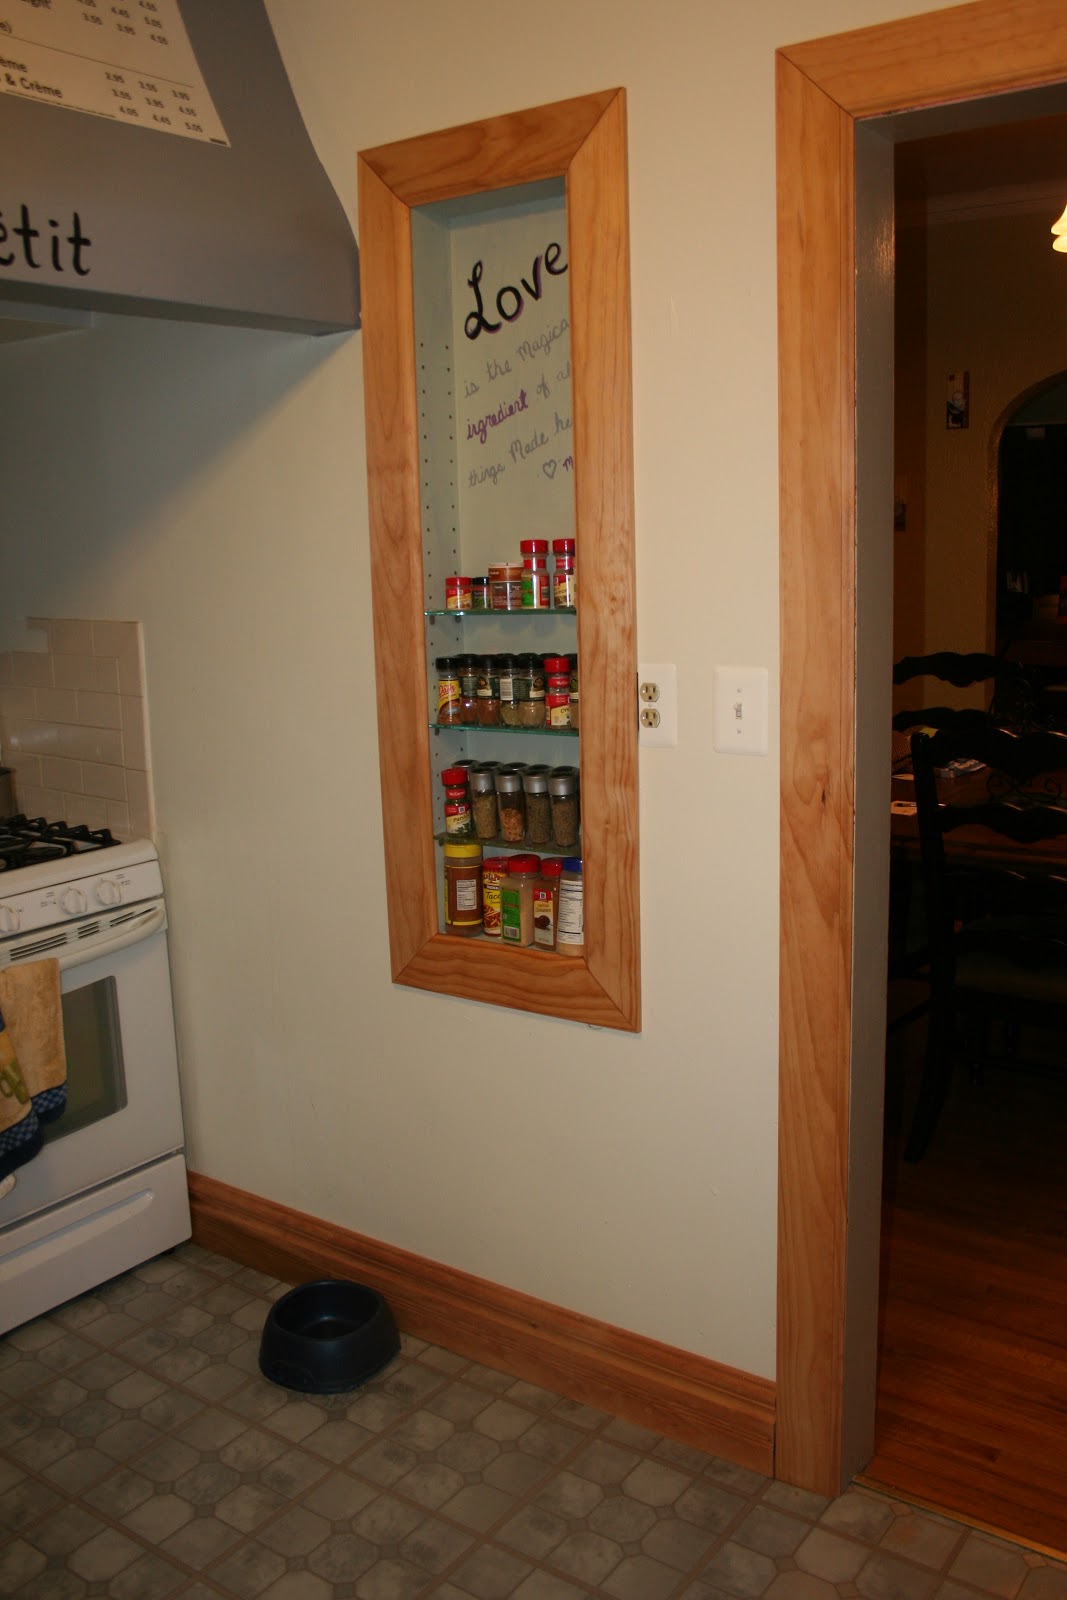
Kitchen-Finished

YEAH! All the trim in the whole kitchen is finally up.  The decorations are slowly coming together.  It really feels like home again. And it is all done just in time for our new little one to arrive.  I love the super wide baseboards. Thanks to a special friend at church for allowing us to use his saw, that was amazingly nice of you and we couldn't have done it without you!


Thank you to my mother and brother in law for coming out and helping us get things finished in there.  It was amazing to have your company and you were such a huge and wonderful help. 
Now we just need to figure out what we want to do with that back door.  We are having a dilemna-paint it white, strip and stain it to match all the new trim, or buy a new door when they go on sale.  I'm opting for the new door I believe.  It is kind of old and scratched up, we shall see what we come up with.

Monday, February 13, 2012

Kitchen!

I can now say that I have a fully functioning kitchen! My excitment is beyond words!  During this past week I finished sanding down the last of the cabinets, and then I finished staining them.  We went to hang them and of course we ran out of screws and the hardware store in town was already closed.  So the next day we went out got the rest of the screws that we needed! Now guess what, ALL of my cabinets are back in full working order. I have organized everything the way that I want, and I am the happiest person alive, I'm quite sure of it!


We also had a great friend of ours bring over his table saw and miter saw yesterday so we can hopefully get to working on cutting all the trim that is left to go up. Because guess what that is all that is left to do in the kitchen!
Now on to decorating.  I have some really fun ideas, I will see what I can make of them and if they work.  I will definitely be posting about them.  I may even post about them if they fail, just so if you know of a better way to accomplish it, maybe I can get it done.
It looks so much brighter in there the difference is unreal.  You can't really tell how much brighter from the pictures, but even our wonderful roommate said it looked amazing and so much nicer(and he is a man!)

Wednesday, January 11, 2012

Redone pants=cute skirt!

I have been needing some new bottoms since recently my clothes decided shrink...don't know why but all my pants are high waters!  I was trying to fall asleep last night and couldn't, when I suddenly got the idea to try and make a skirt out of my khaki pants. I couldn't wait to fall asleep so I could get started on the project bright and early. This took me about 1 hr to make, probably would have gone faster if I knew what I was doing but I made it up as I went along and prayed it would work.

 First, I measure the inseam of the pants it was 29", I then measure up from the bottom 14.5" and pinned it on both sides and in the middle of the leg.  I then cut the leg off where I had placed the pins.  This made them look like shorts!
 Next I cut the top off off the pants, I did this by going to the beginning of the inseam and cutting it off there, now they look like booty shorts, haha something I would never in a million years wear.  Now I have 4 pieces of leg and the top part of the pants.
Now, cut the inseam off all the pants so that they lay flat!  Pin them together with seam allowance.  I just did the side of the pants where the old hem was so I didn't have too do any measuring.  I know measuring is a necessary step but in my opinion it is the most boring part of sewing, that and the pinning!
 Start sewing all those seams together. I first sewed them all in a straight line and then when I had all the pieces put together I sewed the last two end together to make a circle.  I did not use half of one of the pant legs or it would have been waaaay too wide, so do make sure you measure the total length and that it isn't going to be too big or small.  You don't want to have to take the whole thing apart later.
 We are going to attach the top and bottom piece together now.  With right sides of the fabric facing each other, pin in place.  I did a slight gather on mine because I wanted it to be go out a bit in the legs and not fit too tight.  Then you are going to sew these two pieces together.  I used a 1/2"seam allowance just in case, I didn't want it too close to the edge and risk it coming unraveled.  One of my biggest fears even though nothing has ever come of it, I would be horrified if that happened so I always do a bigger seam allowance on my clothes!
 Turn the fabric right side out when you are done sewing and now you are going to hem up the bottom of the skirt so it looks nice!  I used 1/2" here also. 
 What do you think?  I think it turned out quite nicely, especially for being made out of a pair of pants.
It is more fitted through the hips and then flares out some.  I'm really excited to wear this, I might just wear it to work tonight.  By the way, theses were made out of maternity pants, so now I have a maternity skirt to wear, I'm kind of excited about that.  You could do this with any kind of pant but that is why there is no zipper or anything since it has that lovely huge stretchable waist band.