Showing posts with label skirt. Show all posts

Wednesday, August 22, 2012

Jersey knit skirt/yoga style

First you are going to need some measurements.
Measurement A-the width of persons waist minus 2 inches
Measurement B-how long you want it to be(I did mine knee length) (plus 1" for seam allowance)

*When using knit fabric you want to make sure you are always using the side that stretches as your width, so it can stretch up over your hips(if you have wide hips like me).
I don't have any pictures of the process on this one, I apologize, I will look for a tutorial elsewhere to see if I can link it up so if you have questions you can refer to something(I know I'm a visual learner and have to see it in order to do it) http://sewmamasew.com/blog2/2010/06/yoga-skirt-tutorial-tips-on-using-knits/  She explains it really well here and has lots of pictures!

First, we are going to cut out the waistband, so the stretchy side of the fabric needs to equal your measurement A with 1/2" seam allowance.  The length of the fabric will be 7 inches, giving you ample room to fold over the top yoga style. I cut mine in one big strip so that I would only have to sew up one side(it's faster that way)  Now you are going to sew it up so that it makes a waistband! So sew the short sides together using 1/2" seam allowance.  On knit fabric make sure your tension is a bit looser than normal.  I had mine on 2, and with most cotton I use 1!
Now you are going to fold it in half yoga style, so it should be about 3.5" tall, fold it so that your side seam is now on the inside.

Onto the main part of the skirt.  Cut this the full width of the fabric(stretchy side), this will let it be gathered and give it some fullness so it doesn't stick to you.  Of course you don't have to cut it that big if you are making it for a baby, just measure their hips and add like 5" so you can gather it some to make it flow nice! Then you are going to use your measurement B to cut in the length that you want it(not on the stretchy side).

Sew the side seams together using 1/2" seams.  Next you are going to hem up the bottom of the skirt.  I used about 1/2" seam allowance.  You can either sew this using a serger if you have one.  I currently don't so I used a zig zag stitch with my tension at a 2 to sew this up. I actually love the way it came out.  It isn't too noticeable, but it adds kind of a fun homemade flair!

Now if you want to gather the top so that is is kind of flowy(is that a word?), you can go across the top of the skirt and gather it by pinning it to the waste band and gathering it a bit as you go, or you can use a gather stitch, click here for link on how to do this.  Once your fabric is gather(I used the sewing method, I never can manually gather very evenly), pin the waistband to the top of the fabric.  This gets tricky to explain-pin it so that the bottom of the waistband is at the top of the skirt, but in order to do this so no seams show, you have to slide the whole waistband over the skirt with that bottom part facing up.(I hope that makes sense, if it doesn't you can always message me and I will try and explain it better).  Make sure your fabric is gathered so that it will fit around your hips, then as you sew stretch the waistband so that it will go over your hips.  If you make the skirt to match the waistband and you have wide hips the stitches will most likely rip:(  Sew this up using a loose stitch(2 still for me).  Now turn it all right side out and you have a skirt.  The last thing I did was I took out the gather stitches, a bit time consuming, but well worth it because then the skirt will stretch better when you go to put it on.(I would recommend spending the time on this one).  Then when you put it on you can fold the top part down.  This is such a wonderful skirt.  I made one for myself and one for my new little girl and we wore them in May to the wedding(I know took me long enough to post huh??)
At the Rehearsal dinner in her new skirt!
 
At the wedding in my skirt!

I wore this skirt after my C-Section because it felt so comfy and didn't rub on my scar! Also would make a good maternity skirt as it can stretch with you, or just a skirt for comforts sake(always a must for me)

Sunday, March 4, 2012

Quilted skirt-Adult

Fabric Strips: 3"x21"
Bottom wide piece:11.5"x(1.5x your waist measurement)
Bottom Skinny Piece: 3"x(1.5x your waist measurement)
Waistband" 2"x(how ever big your waist is)
Elastic: I used 1/2" and then 2" less than my waist measurement.

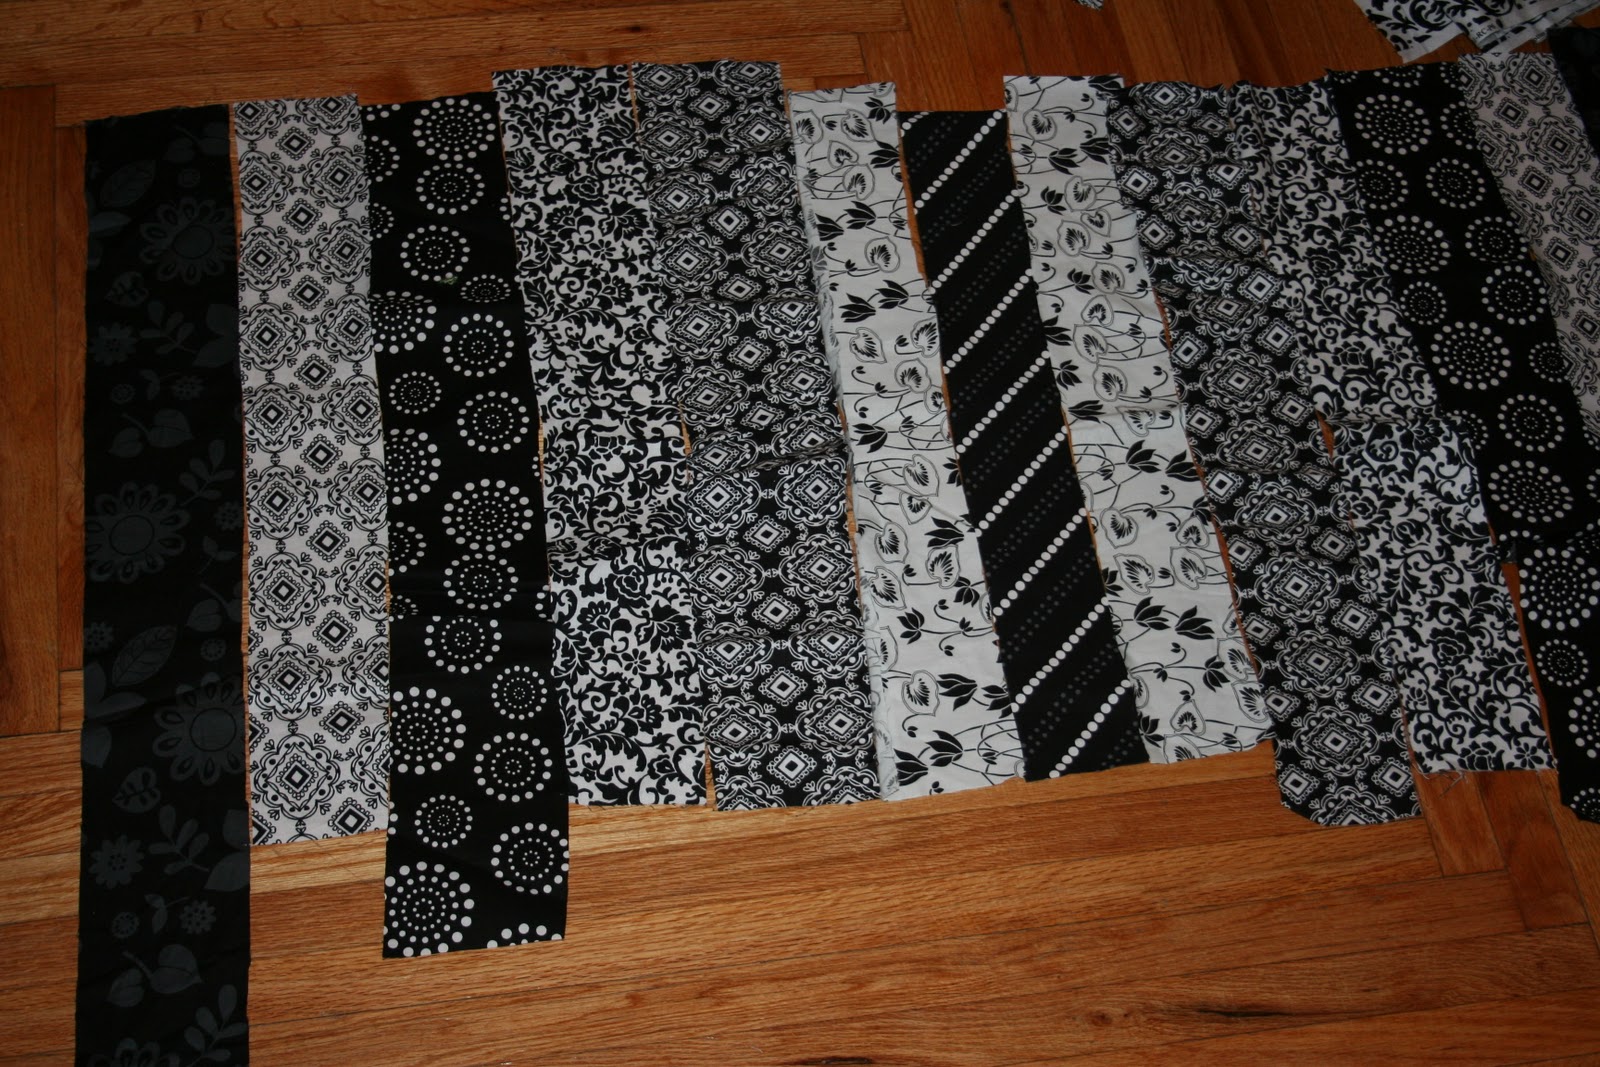
I decided to make this skirt because I had a lot of leftover black and white fabric but not enough of any of it to make a skirt for myself.  Soo I decided I would give it a quilted look and piece them all together.

To start out I cut out all my strips of fabric. I needed 15 strips.
I had a very good helper!

Next, I placed them all out to make sure that they looked evenly spaced with not too much black background in a row. I know they are not all the same length. I cut them all even later(I just started with the length that I had of each fabric to see how long I could get it)

Now you set to work on sewing all these strips together. I used 1/4" seam allowance on these.


 So now you should have what looks like a block of fabric. Make sure it will be wide enough to fit all the way around you! I trimmed the edges all even after I had all the pieces attached.

I then took the pieces I had cut out for the bottom pieces of the skirt and I gathered them at the top click here if you need directions on how to do this.  I then sewed both of these pieces together to make the full bottom.

Take your bottom piece and sew it to your block of fabric scraps, make sure you do this with the right sides together so that you get a nice clean seam.  Also sew it right above the gathered stitch so that the messiness of it is covered.


Now for the waistband.  Take your elastic and put it in your waistband.  I did this by adding it before I put the waistband on the skirt.  Make sure the elastic is 2" shorter than the fabric so that it will hold it better. 
To insert the elastic waistband, fold the top part of the skirt over, and tuck in the bottom so you have a nice clean edge. Now sew up the side.  Make sure you pull on the elastic as you go, so that it will bounce back into place when it is finished. (I forgot to take pictures of this step I'm so sorry and this is a complicated piece to explain)

Once your waistband is made, attach it to the rest of the skirt.  Make sure when you attach it the elastic is at the top and that you sew it with right sides together, this just always keeps everything looking neat and tidy!Turn the fabric so it is right sides together and sew up the side seams.  This will make it a circle.  You are done. Enjoy!

Saturday, February 18, 2012

Ruffle bottom skirt pattern

First cut out a piece of fabric that is 18"x8".

The first thing I did on this one was to put in the elastic waistband and it worked so much better than putting it in last.
To do this you are going to make a "pocket" for the elastic to go into.-this means I folded the top part of the fabric 1/4" down and ironed it flat(this was so there were no rough edges in the skirt). Next, Fold 1/2" of the fabric over and iron it so it lays flat. Now you are going to put the elastic in the 1/2" fold that you ironed.  The elastic should be 1-2" shorter than the width of your skirt so that it will stretch.  Sew this up, while pulling on the elastic while you are sewing. Now your waistband is done!

Next cut out a strip of fabric that is 1.5xs the width of the skirt and 2" wide.   First hem the bottom part I used a 1/4" seam for this.  You are going to do a gather on the top of this so that it ruffles.  If you want to check out how to do that follow the link here and it will show you.

Now attach the ruffle piece of fabric to the bottom of the skirt.  Pin it so that it stays and you can then make sure you don't need to adjust the ruffle lengths anywhere. (Make sure the right sides of the fabric are together so you won't see any rough edges).  I used a 1/2" seam make sure that the top part where you gathered will be hidden once you turn it the right way.

Now that your bottom is attached to the skirt, sew up your side seam so that it makes a circle and you are done!

Easy and cute right??

Tuesday, January 31, 2012

Ruffle Skirt

I decided to make our little one a cute skirt!  Possibly one to wear to Uncle Matt's wedding in May, she will be 1 mo old at the wedding and I want her to look cute but didn't really want to go buy a big fancy dress since Elijah grew way to fast to keep him in any clothes!!

So here is the pattern.  I kind of made it up as I went as I had an idea of what I wanted and then just ran with it.  Also note, this is my first attempt at an elastic waistband on anything so we will see how it goes!  I think I am going to take the blue material that is left, and make Elijah a matching tie or bow tie onesie so they match.  Then maybe a skirt for me.... Just thinking out loud sorry.  Ok, onto the pattern.

Fabric strips for ruffles: 2.5" wide, 27" long
Fabric for base of the skirt: 18" wide, 9"long
Elastic 1-4" less than waist of the skirt
Thread and Sewing Machine

First cut out the Fabric for the width of the skirt and length.  I do not have a baby to measure this on so I had to kind of guess.  I used a newborn pant waist and a 3 mo dress and put it somewhere in the middle(hopefully it will fit).  You can adjust the sizes of this to fit any little girl in your life.  Just measure their waist and add some space for seam allowance and go from there.  Now hem up what will be the bottom of this rectangle.  That way you have a nice smooth bottom edge of your fabric with no loose ends to worry about.

Last sew the two ends together so that you get a circle which will be the base for your skirt.  You will then pin everything onto this one piece.  So it should be 17.5" around and about 8.5" in length just so you have an idea.

For the ruffles you will need them to be 1.5x the width of the skirt so you have room to gather as needed.  Hem the bottom of the ruffle.  Then you are going to do a gather stitch for the ruffle.


To do this you are going to set your sewing maching to the greatest stitch length (mine is 4) on just a straight stitch, also make the tension less.  Sew in a straight line.  Pull on the bottom thread(bobbin one) so that the fabric will gather, don't pull too hard as you don't want to break the thread.   You will need to pull on some of the fabric as well to help it along, just remember nothing too hard.  I cheat with the gather stitch and I only do one instead of two-it is quicker that way!

Pin into place and sew onto the fabric, I like to start at the bottom so I can see where I need to go. Easier for my brain I guess.


Add the next ruffle 1.25 inches up from that one, continue for the next 3 ruffles.


We are going to use the rest for the waistband and hemming!-This gives us a lot of room but I wanted a lot in case I messed up so you could probably cut like 2 inches off the top if you wanted, especially if you have done elastic waistbands before!

Now it is time to tackle the waistband. I'm new at this so I hope I explain this well.

First I sewed the top 1/2" down so it looked hemmed, just to give it a clean look no matter what happened! That is the easy part.  Next, we are going to fold the fabric over top of the raw edges so that we hide it.  I did this in an accordian style.  So the right sides of the fabric were together, but it still came out with the right side up. (I hope that makes sense, there is a picture below)


Inside view!


Outside view!


Sew the edge by the ruffles to cover up the top of the gathering.

Once it is all sewn, you are now going to insert the elastic waistband. Make sure when you cut the elastic that it is 2" shorter than the fabric.  It will make it bunch up more.


 Make sure when you put the elastic in that you pull it really tight and sew it up close to the elastic so it stays stretched. I would pull it tight, pin it in place, sew up to the pin.  Pull it again and pin it.  I repeated this until the elastic was all sewn in.

Sew the top part down so that it is all clean.  I did a zig zag stitch on the top just for extra flair.  It looked really nice in the end. The inside should look like below. You are now done! Not too hard right??

Wednesday, January 11, 2012

Redone pants=cute skirt!

I have been needing some new bottoms since recently my clothes decided shrink...don't know why but all my pants are high waters!  I was trying to fall asleep last night and couldn't, when I suddenly got the idea to try and make a skirt out of my khaki pants. I couldn't wait to fall asleep so I could get started on the project bright and early. This took me about 1 hr to make, probably would have gone faster if I knew what I was doing but I made it up as I went along and prayed it would work.

 First, I measure the inseam of the pants it was 29", I then measure up from the bottom 14.5" and pinned it on both sides and in the middle of the leg.  I then cut the leg off where I had placed the pins.  This made them look like shorts!
 Next I cut the top off off the pants, I did this by going to the beginning of the inseam and cutting it off there, now they look like booty shorts, haha something I would never in a million years wear.  Now I have 4 pieces of leg and the top part of the pants.
Now, cut the inseam off all the pants so that they lay flat!  Pin them together with seam allowance.  I just did the side of the pants where the old hem was so I didn't have too do any measuring.  I know measuring is a necessary step but in my opinion it is the most boring part of sewing, that and the pinning!
 Start sewing all those seams together. I first sewed them all in a straight line and then when I had all the pieces put together I sewed the last two end together to make a circle.  I did not use half of one of the pant legs or it would have been waaaay too wide, so do make sure you measure the total length and that it isn't going to be too big or small.  You don't want to have to take the whole thing apart later.
 We are going to attach the top and bottom piece together now.  With right sides of the fabric facing each other, pin in place.  I did a slight gather on mine because I wanted it to be go out a bit in the legs and not fit too tight.  Then you are going to sew these two pieces together.  I used a 1/2"seam allowance just in case, I didn't want it too close to the edge and risk it coming unraveled.  One of my biggest fears even though nothing has ever come of it, I would be horrified if that happened so I always do a bigger seam allowance on my clothes!
 Turn the fabric right side out when you are done sewing and now you are going to hem up the bottom of the skirt so it looks nice!  I used 1/2" here also. 
 What do you think?  I think it turned out quite nicely, especially for being made out of a pair of pants.
It is more fitted through the hips and then flares out some.  I'm really excited to wear this, I might just wear it to work tonight.  By the way, theses were made out of maternity pants, so now I have a maternity skirt to wear, I'm kind of excited about that.  You could do this with any kind of pant but that is why there is no zipper or anything since it has that lovely huge stretchable waist band.