1 lb ground beef-browned
1/2 package of 16 oz noodles-your choice
1 c sour cream
4 oz cream cheese, softened
1/4 c beef broth
1 can cream of mushroom soup
1 tsp garlic powder or 1 clove of garlic minced
1 tsp onion powder or 1/2 onion chopped fine
Cook the noodles according to package instructions. Add to the bottom of a 8"x8" pan. Next add the ground beef. Mix the last ingredients together until smooth. Pour over top of the beef and noodles. Bake at 350 for 40 minutes. It may look a bit funky but I promise you it tastes wonderful!
This is a super yummy and easy meal. Almost like a beef stroganoff but with ground beef instead of a stew type meat so it is a bit more cost effective. I added some parmesan cheese on top when it came out of the oven. It also freezes well. Just assemble and just before you would put it in the oven cover in foil, label/date, and place in the freezer. Thaw before cooking in the oven.
Showing posts with label homemade. Show all posts
Monday, June 25, 2012
Friday, June 15, 2012
Angel Food Cake
7 egg whites
1/2 c flour
3/4 c sugar
1 1/2tsp baking powder
2tsp vanilla
Preheat oven to 325 Beat the egg whites with the baking powder and vanilla until it is foamy. Then add half of the sugar to the mixture. Beat until soft peaks form. Mix the remaining sugar and flour together. Slowly add to the egg white mixture folding it in gently. Pour into a loaf pan or a bundt pan if you have one. Bake at 325 for about 30 minutes.
Chocolate Ganache:
1 c heavy whipping cream
1 c chocolate chips
Mix together in a sauce pan until well melted and it begins to get thick. While still hot pour over top of the cake!
Angel Food cake is good by itself, but I like a bit of spoiling so I always add the chocolate ganache on top and I also then add some fresh strawberries you know just to make it seem a bit heathier. Elijah loved it! What do you think?
1/2 c flour
3/4 c sugar
1 1/2tsp baking powder
2tsp vanilla
Preheat oven to 325 Beat the egg whites with the baking powder and vanilla until it is foamy. Then add half of the sugar to the mixture. Beat until soft peaks form. Mix the remaining sugar and flour together. Slowly add to the egg white mixture folding it in gently. Pour into a loaf pan or a bundt pan if you have one. Bake at 325 for about 30 minutes.
Chocolate Ganache:
1 c heavy whipping cream
1 c chocolate chips
Mix together in a sauce pan until well melted and it begins to get thick. While still hot pour over top of the cake!
Angel Food cake is good by itself, but I like a bit of spoiling so I always add the chocolate ganache on top and I also then add some fresh strawberries you know just to make it seem a bit heathier. Elijah loved it! What do you think?
Saturday, May 26, 2012
Bedroom curtains
I needed to make some curtains for our bedroom as they were looking rather dull. Also the fire escape window down there has had a blanket over the window since we moved in. It was definitely time for an update what do you think?
While searching pinterest one day I found a picture of some really pretty curtains. I showed them to my husband and got to work on trying to mimic them. I never looked to see if there was a tutorial attached to the picture I just got to work on making them.
First, I took a sheer curtain and cut it into strips. I cut them 14" wide, and I believe it was like 32" long. Anyway you would cut them to the length of the window you are making plus 2" for the top so a curtain rod can go through it and another 1/2" for seam allowance on the bottom. If your curtain rod is wider, then you would obviously need to add more fabric to the length to make up for that difference.
Second, I then cut the grey fabric to 1.5X that length since it is going to have a ruffle in it. Make the top part for the curtain rod-I did this by just folding the top piece of fabric over to the wrong side of the fabric so they are wrong sides together and just stitched it up so you can slide the rod right through it. I hope that makes sense.
Third, once it is cut then you are going to do a gather stitch down the middle of the curtain. Gather this up so that it is the same length as your other strips of curtain.
Forth, hem up all the bottom seams on everything to hold the gather in place. Trim any loose ends of string off.
Fifth, Hang on the curtain rod. Looks much better don't you think. Now I just need to make another one for the little window!
While searching pinterest one day I found a picture of some really pretty curtains. I showed them to my husband and got to work on trying to mimic them. I never looked to see if there was a tutorial attached to the picture I just got to work on making them.
First, I took a sheer curtain and cut it into strips. I cut them 14" wide, and I believe it was like 32" long. Anyway you would cut them to the length of the window you are making plus 2" for the top so a curtain rod can go through it and another 1/2" for seam allowance on the bottom. If your curtain rod is wider, then you would obviously need to add more fabric to the length to make up for that difference.
Second, I then cut the grey fabric to 1.5X that length since it is going to have a ruffle in it. Make the top part for the curtain rod-I did this by just folding the top piece of fabric over to the wrong side of the fabric so they are wrong sides together and just stitched it up so you can slide the rod right through it. I hope that makes sense.
Third, once it is cut then you are going to do a gather stitch down the middle of the curtain. Gather this up so that it is the same length as your other strips of curtain.
Forth, hem up all the bottom seams on everything to hold the gather in place. Trim any loose ends of string off.
Fifth, Hang on the curtain rod. Looks much better don't you think. Now I just need to make another one for the little window!
Thursday, May 3, 2012
Cake Batter Milkshake
I love pinterest and all of the exciting things that you can find there. It was through pinterest that I found this link http://abeautifulmess.typepad.com/my_weblog/ She has some really cool things in there, but the one I am talking about today is her cake batter milkshake.
I cannot take any credit for this except to tell you that I made it and it was absolutely amazing!! I'm convinced that anyone who likes cake batter or chocolate should try this out. I made the chocolate one, although she does give you a couple of other other recipes to chose from!
Here is a picture of mine:
Just a heads up, these are really super rich and it took me like an hour to finish this small glass. My husband on the other hand downed it in about 5min flat raving about how absolutely wonderful it was:) I just thought I would share this link with all because it is so worth trying!
I cannot take any credit for this except to tell you that I made it and it was absolutely amazing!! I'm convinced that anyone who likes cake batter or chocolate should try this out. I made the chocolate one, although she does give you a couple of other other recipes to chose from!
Here is a picture of mine:
Just a heads up, these are really super rich and it took me like an hour to finish this small glass. My husband on the other hand downed it in about 5min flat raving about how absolutely wonderful it was:) I just thought I would share this link with all because it is so worth trying!
Saturday, April 28, 2012
Breakfast Mush
This is what my husband so lovingly named this dish-and since I threw everything in a pan it seemed to fit it perfectly so that is the name of this wonderful dish. Let's turn this unlucky Friday the 13th(I don't really believe in this but you know) into something wonderful by making this wonderful dish for breakfast!
Ingredients:
6 eggs
splash of milk
4 slices of bacon
1/2 lb of sausage
1 c shred cheese(I used cheddar)
2 c hash browns
Ok I don't like to do too many dishes so here is how we make this in one pan!
First you are going to cook your bacon and sausage, yep in the same pan. Just brown the sausage on one side and cook the bacon to your liking on the other side. Although it does work better if the bacon is a little crispy as we will crumble it up later.
When the bacon is done, remove from a pan and place on a paper towel to cool. Keep cooking the sausage and while this is continuing to cook you can now throw in your hashbrowns. All that bacon and sausage grease will make them cook nice with no extra oil needed!
While those are cooking, in a bowl mix together the eggs and milk. Once the hashbrowns look most of the way cooked, add the egg mixture to the pan. Now we are also going to put the bacon back into the pan, crumble the bacon as you put it in the pan. When the eggs are about done add the cheese. The cheese should be melty and guess what you are done.
I think this took about 30min from start to finish so not too terrible long. The longest part is cooking the bacon and sausage because I always do that part on a low heat so they don't burn.
Ingredients:
6 eggs
splash of milk
4 slices of bacon
1/2 lb of sausage
1 c shred cheese(I used cheddar)
2 c hash browns
Ok I don't like to do too many dishes so here is how we make this in one pan!
First you are going to cook your bacon and sausage, yep in the same pan. Just brown the sausage on one side and cook the bacon to your liking on the other side. Although it does work better if the bacon is a little crispy as we will crumble it up later.
When the bacon is done, remove from a pan and place on a paper towel to cool. Keep cooking the sausage and while this is continuing to cook you can now throw in your hashbrowns. All that bacon and sausage grease will make them cook nice with no extra oil needed!
While those are cooking, in a bowl mix together the eggs and milk. Once the hashbrowns look most of the way cooked, add the egg mixture to the pan. Now we are also going to put the bacon back into the pan, crumble the bacon as you put it in the pan. When the eggs are about done add the cheese. The cheese should be melty and guess what you are done.
I think this took about 30min from start to finish so not too terrible long. The longest part is cooking the bacon and sausage because I always do that part on a low heat so they don't burn.
Friday, April 27, 2012
Asian Salmon
Ingredients:
4 Salmon Fillets
1/3 c olive oil
1/4 c soy sauce
1/4 c terryaki sauce
1 tsp garlic powder
1 tsp onion powder
1 tsp ginger powder
1/4 c brown sugar
Wednesday, April 25, 2012
Rosemary Red Skin Potatos
Ingredients:
Red skin potatos
1 tsp garlic powder
1 tsp onion powder
2 tsp rosemary
1 tsp parsley
2 TBSP olive oil
Preheat oven to 375. Cut up your potatos. Put into a 8X8 baking dish. Drizzle with olive oil, and then sprinkle all of the spices over top of the potatos. Bake in the oven for 30-40min-until done. I like mine just a bit soft but not mushy. ENJOY! This makes enough for 5 people. (I usually buy a small bag of the potatos and just use whatever is in that size bag if that helps any)
These are super easy and taste excellent!
Red skin potatos
1 tsp garlic powder
1 tsp onion powder
2 tsp rosemary
1 tsp parsley
2 TBSP olive oil
Preheat oven to 375. Cut up your potatos. Put into a 8X8 baking dish. Drizzle with olive oil, and then sprinkle all of the spices over top of the potatos. Bake in the oven for 30-40min-until done. I like mine just a bit soft but not mushy. ENJOY! This makes enough for 5 people. (I usually buy a small bag of the potatos and just use whatever is in that size bag if that helps any)
These are super easy and taste excellent!
Monday, April 23, 2012
Pizza Rolls
Ingredients:
2 cans jumbo biscuits
32 pepperoni
1 c Shredded Mozzarella Cheese
1 jar pizza sauce
2 cloves garlic-minced
4 TBSP butter-melted
1. Cut the biscuits in half, so you have 32 instead of 16
2. Layer the biscuits first with pepperoni, and then a bit of the cheese
4. Mix the butter and garlic together(I always like to melt my butter with the garlic in it, I feel like it gets more garlic flavor into the butter, but that is just me)
5. In a loaf pan, or bunt pan which ever you prefer, coat the pan with the butter mixture.
6. Add all the biscuits to the pan, and brush the biscuits with the remaining butter
8. Warm up your pizza sauce and use to dip the rolls into!
9. Enjoy!! These were really good and super easy to make. Now you could always make these out of real pizza dough, but I was trying to do something a bit easier since I have a newborn baby and a 15month old running around. I was going for simple and it ended up being really, really yummy. My hubby said I could make them anytime!
Sunday, April 15, 2012
Puff Pancakes
You can never have enough breakfast food in my opinion! I used to love these pancakes growing up, although my family always called them puff puff pancakes, not sure why, although my mom or dad could tell you I'm sure. I hope you enjoy it as much as I did growing up and still do, as it brings back so many good childhood memories.
Ingredients:
1/2 c Flour
1/2 c milk
2 eggs
1/4 tsp vanilla
pinch of nutmeg
4 TBSP butter
Turn your oven on to 425 degrees. In a 9" pie pan slice the butter and put in the oven, you want the butter to melt but not turn brown. While that is in the oven mix your other ingredients together. Once butter is melted take the pan out of the oven and pour in the batter. Place back in the oven(it should be preheated by now), and bake for 20 min. It should be slightly brown and the sides and maybe portions of the middle should be all puffed up. Hence the name puff pancake.
In my family my mom always pulled out some frozen fruits and defrosted them while this was cooking. We always had a bowl of blueberries, strawberries, and raspberries. I added some peaches this past time just for kicks and giggles. Once it is out of the oven, slice it and put whatever fruit of your choice you would like on top. And of course everything tastes better with a bit of sugar so then we always added a spoonful of powder sugar on top! Yummy.
Ingredients:
1/2 c Flour
1/2 c milk
2 eggs
1/4 tsp vanilla
pinch of nutmeg
4 TBSP butter
Turn your oven on to 425 degrees. In a 9" pie pan slice the butter and put in the oven, you want the butter to melt but not turn brown. While that is in the oven mix your other ingredients together. Once butter is melted take the pan out of the oven and pour in the batter. Place back in the oven(it should be preheated by now), and bake for 20 min. It should be slightly brown and the sides and maybe portions of the middle should be all puffed up. Hence the name puff pancake.
In my family my mom always pulled out some frozen fruits and defrosted them while this was cooking. We always had a bowl of blueberries, strawberries, and raspberries. I added some peaches this past time just for kicks and giggles. Once it is out of the oven, slice it and put whatever fruit of your choice you would like on top. And of course everything tastes better with a bit of sugar so then we always added a spoonful of powder sugar on top! Yummy.
Tuesday, April 10, 2012
White Board-Homemade
Well now that this baby is finally here and I don't feel so exhausted I will catch up on a couple of my posts. I was so busy trying to get them all done, I didn't take as many pictures as I would have liked so I apologize for that. I'm just excited to finally get them all on here for everyone to see. So keep your eyes peeled for more of what has been going on in the kitchen and the basement!
I decided to put one of my old frames to use, since I was just going to throw it away. But it was still in good condition.
I have wanted a place in my house where I could write a different verse each week just to give us all a small reminder of God's promises to us, and all that He has done for us.
I took the back off the frame and cleaned both sides of the glass really well.
I then found a piece of scrapbook paper that I liked, and cut it to the size of the frame. I also took some of my flower pieces and put two flowers on the paper just for kicks and giggles. The frame before just had a paper backing and that was torn up from me removing it and since I have a ton of cardboard boxes from cleaning out the storage room I decided to cut one of those to size and place in the back of the frame. I cut it so that it would fit really snug and I wouldn't have to hold it in with anything else.
What do you think? I love it and got right to work with writing on it. I think it goes nicely in our newly finished basement and really adds a family element to the family room. Since we want our family firmly based on God and His Word this is a perfect reminder!
I decided to put one of my old frames to use, since I was just going to throw it away. But it was still in good condition.
I have wanted a place in my house where I could write a different verse each week just to give us all a small reminder of God's promises to us, and all that He has done for us.
I took the back off the frame and cleaned both sides of the glass really well.
I then found a piece of scrapbook paper that I liked, and cut it to the size of the frame. I also took some of my flower pieces and put two flowers on the paper just for kicks and giggles. The frame before just had a paper backing and that was torn up from me removing it and since I have a ton of cardboard boxes from cleaning out the storage room I decided to cut one of those to size and place in the back of the frame. I cut it so that it would fit really snug and I wouldn't have to hold it in with anything else.
What do you think? I love it and got right to work with writing on it. I think it goes nicely in our newly finished basement and really adds a family element to the family room. Since we want our family firmly based on God and His Word this is a perfect reminder!
Tuesday, April 3, 2012
Coffee Creamer
I found this link on Pintrest and was immediately inclined to try and make some, since I love my coffee and it has to have a lot of creamer in it.
I will say not as good as the store bought kind, but definitely easy to make and great in a pinch as I was on Saturday when I made this. I will keep this recipe handy for those times when I don't have a way to get to the store and buy some creamer before I run out.
What you are going to need:
Mason Jar
1 can sweetened condensed milk (14oz)
2 tsp vanilla flavoring
14 oz of milk (I think it might help the flavor a bit if you used half and half or heavy whipping cream, although worse for you, my taste buds are used to REAL creamer)
Put all of these in your mason jar, and shake it up until it is well mixed. Store in the fridge. Now wasn't that easy??
If you are a health nut or want to be a bit healthier you can always use skim milk and they have fat free sweetened condensed milk, but I'm not that kind of person-the more fat the better in my opinion!
I will say not as good as the store bought kind, but definitely easy to make and great in a pinch as I was on Saturday when I made this. I will keep this recipe handy for those times when I don't have a way to get to the store and buy some creamer before I run out.
What you are going to need:
Mason Jar
1 can sweetened condensed milk (14oz)
2 tsp vanilla flavoring
14 oz of milk (I think it might help the flavor a bit if you used half and half or heavy whipping cream, although worse for you, my taste buds are used to REAL creamer)
Put all of these in your mason jar, and shake it up until it is well mixed. Store in the fridge. Now wasn't that easy??
If you are a health nut or want to be a bit healthier you can always use skim milk and they have fat free sweetened condensed milk, but I'm not that kind of person-the more fat the better in my opinion!
Thursday, March 22, 2012
Disposal Cleaner
I like my disposal to always smell clean, I mean come on who doesn't. My disposal seems to get stinky quite often as we do a lot of dishes and a lot of extra food pieces go down the disposal. I would often put half a lemon down the drain. If I didn't have a lemon I would run some vinegar down the drain, and then clean the sink with some yummy smelling lemon cleaner. This made me think surely there is an easy way to store a disposal cleaner premade!
Since I love both of these I decided to use them both. I have heard before that it is good to run ice down the disposal to really clean the blades. (I'm not sure where I heard this, it could have been my dad-he always seemed to know everything about cleaning things and the right chemicals and mixtures to use to get the best results) So why not make some lemon/vinegar ice?
Here is what I used:
2 ice cube trays
2 c Vinegar
2 c Lemon Water -click here to see how I made it
Since I love both of these I decided to use them both. I have heard before that it is good to run ice down the disposal to really clean the blades. (I'm not sure where I heard this, it could have been my dad-he always seemed to know everything about cleaning things and the right chemicals and mixtures to use to get the best results) So why not make some lemon/vinegar ice?
Here is what I used:
2 ice cube trays
2 c Vinegar
2 c Lemon Water -click here to see how I made it
Now just fill each ice cube tray up with half the vinegar and half the lemon water. It smells wonderful going down the drain. Both the lemon and vinegar have disinfecting agents, and both make the drain smell much better. Now place in the freezer. Once frozen transfer to a freezer Ziploc bag, date and label (so you don't accidentally use for something else). When needed pull out an ice cube and turn on the disposal. Enjoy the cleaning effects and the smell. Also enjoy the fact that you didn't pour any harsh chemicals down your drain.
Friday, March 16, 2012
Coffee Sign
For those of you who know me quite well you know that I love coffee. I worked in a coffee shop for 5 years and loved it, but I also grew up around it. My parents and grandparents were always drinking coffee, I think it has become more of a comfort item then a necessity. When I was pregnant with Elijah I couldn't drink coffee for the first 3 months because it made me nauseous, and then all the sudden one day I craved it, and yeah I was able to drink it again.
Any way, now that my kitchen is done I am going to keep the coffee theme going in there. Since I changed the colors though I need some new decorations. Since I would prefer to make something cool, then go buy something really expensive I came up with this idea!
What you will need:
Canvas
Old Floor Tiles(mine were peel n stick vinyl so they were not too heavy)
coffee filters
Hot glue gun/glue
First, on my canvas I laid out all the scraps of tile that I had left from putting the flooring in. I didn't really want any of them to go to waste, and they made a nice background and obviously matched the kitchen.
Next, I went to town scrunching up all the coffee filters, so they looked pretty. I found for this project it worked better if I cut them in half since I was going to be writting out of them. The full coffee filters were a bit too big.
Then, I set to work spelling out coffee on the tile with the hot glue gun(I only did one letter or half a letter at a time so it wouldn't dry), then I placed the coffee filters on it.
On the bottom underneath the word coffee I put a coffee cup. I centered it under the "f" so that it looked like the fs were more of the steam coming out of the cup of coffee.

Now since I already had the tile(as it was scraps), I already had the canvas(it came in a two pack and I had already used the other one for a different project), the only thing I needed to buy were coffee filters(since my coffee pot has a reusable one). Which means I made this project for a total of 1.50-can't beat that in my book and I really like the way it turned out. This will look wonderful above my arch in the kitchen!
Any way, now that my kitchen is done I am going to keep the coffee theme going in there. Since I changed the colors though I need some new decorations. Since I would prefer to make something cool, then go buy something really expensive I came up with this idea!
What you will need:
Canvas
Old Floor Tiles(mine were peel n stick vinyl so they were not too heavy)
coffee filters
Hot glue gun/glue
First, on my canvas I laid out all the scraps of tile that I had left from putting the flooring in. I didn't really want any of them to go to waste, and they made a nice background and obviously matched the kitchen.
Next, I went to town scrunching up all the coffee filters, so they looked pretty. I found for this project it worked better if I cut them in half since I was going to be writting out of them. The full coffee filters were a bit too big.
Then, I set to work spelling out coffee on the tile with the hot glue gun(I only did one letter or half a letter at a time so it wouldn't dry), then I placed the coffee filters on it.
On the bottom underneath the word coffee I put a coffee cup. I centered it under the "f" so that it looked like the fs were more of the steam coming out of the cup of coffee.
Now since I already had the tile(as it was scraps), I already had the canvas(it came in a two pack and I had already used the other one for a different project), the only thing I needed to buy were coffee filters(since my coffee pot has a reusable one). Which means I made this project for a total of 1.50-can't beat that in my book and I really like the way it turned out. This will look wonderful above my arch in the kitchen!
Wednesday, March 14, 2012
Pacifier Carrier
I cut a piece of fabric 5"x10.5 " I measured this along the fold of the fabric, so the actual size would be twice this length. I then folded it so that right sides were together. Sew this up, but leave one of the short sides open so you can pull the fabric through so it is the right way!
Let's make the strap now before we sew up the next part of the bag! To do this cut a strip a fabric that is 2"x7" fold it in half(with right sides together) so it is 1"x7", sew up one short side and the long side. Now push this so that it is right side out, and you have a strap. I cut this in half and used half for the diaper bag strap and one for the paci strap.
I made it big enough to fit a soothie since those seem to be the biggest pacifiers!
Now you attach the snap to the bag. I bought the kind that you hammer in and they seem to work really well and it doesn't take much time to do. I also attached one half of the snap to the paci holder and the other side of the snap to the diaper bag, so they can be easily moved together!
Matching pacifier holders!
Everything matches! Makes me a happy momma!
Tuesday, March 13, 2012
Diaper bag-small
With another baby on the way, I decided to make a small diaper bag-big enough to hold a few diapers and wipes. That way I can put both of the bags in one big diaper bag and I don't have to carry around two big bags. Especially since they will be in different classrooms but Eli won't need much more than diapers and wipes, and the baby will need more stuff.
Here is the pattern:
First cut the fabric so that it measures 10" x 22". This was cut along the natural fold in the fabric so it is actually twice this size (just a side note).

Now fold it so the right sides are together and sew up the sides. Remember to leave an opening so that you can pull the fabric right side out. I left like a 3" hole so it was a bit easier to turn it the right way.
Iron so that it lays flat. You don't want any air in it or it won't fit in a small space, which is what we want.
Tuck in the raw edges that are left on the one side(you don't need to sew them up). We are going to make a small strap to attach to the bag, so it can be attached to something such as the pacifier carrier.
To make the strap:
Cut fabric 7" long by 2" wide. Fold in half right sides together and sew up the sides, leave one of the short sides open so you can pull the fabric right side out through this hole. You may need to use a long stick, I used a knitting needle to help push the fabric through the hole. Now you are going to cut this in half, so you have a piece that's 3" long. Now you have two to use, we will use the other one in a different tutorial.
Back to the main bag:
Now you are going to fold it in half again so that it makes a rectangle. Place on of the staps on a top corner of the bag, lay it on the inside so it will end up on the outside of the bag.
Sew up the two side seam, your raw edge should be in these side seams. Turn right side out, and guess what you're almost done.
I then put a snap on the top middle of the bag (I bought the kind you hammer into place, really quick and easy to use and not too expensive). I then put half of one snap on the middle of the strap.(I put the other one on the pacifier carrier strap so I can attach them together.) It turned out quite nice!
Here is the pattern:
First cut the fabric so that it measures 10" x 22". This was cut along the natural fold in the fabric so it is actually twice this size (just a side note).
Now fold it so the right sides are together and sew up the sides. Remember to leave an opening so that you can pull the fabric right side out. I left like a 3" hole so it was a bit easier to turn it the right way.
Iron so that it lays flat. You don't want any air in it or it won't fit in a small space, which is what we want.
Tuck in the raw edges that are left on the one side(you don't need to sew them up). We are going to make a small strap to attach to the bag, so it can be attached to something such as the pacifier carrier.
To make the strap:
Cut fabric 7" long by 2" wide. Fold in half right sides together and sew up the sides, leave one of the short sides open so you can pull the fabric right side out through this hole. You may need to use a long stick, I used a knitting needle to help push the fabric through the hole. Now you are going to cut this in half, so you have a piece that's 3" long. Now you have two to use, we will use the other one in a different tutorial.
Back to the main bag:
Now you are going to fold it in half again so that it makes a rectangle. Place on of the staps on a top corner of the bag, lay it on the inside so it will end up on the outside of the bag.
Sew up the two side seam, your raw edge should be in these side seams. Turn right side out, and guess what you're almost done.
I then put a snap on the top middle of the bag (I bought the kind you hammer into place, really quick and easy to use and not too expensive). I then put half of one snap on the middle of the strap.(I put the other one on the pacifier carrier strap so I can attach them together.) It turned out quite nice!
Diaper bags with matching pacifier carriers, one for Eli and one for the baby girl!
Sunday, March 11, 2012
Berry Custard Recipe
Ingredients:
1 2/3 c milk- I use skim
1/4 c sugar
4 tsp cornstarch
2 egg yolks lightly beaten
1 tsp vanilla
3 c berries (if frozen make sure they are thawed)
In a saucepan stir the milk, sugar, and cornstarch together. You have to keep a close eye on this and stir it continually so that it doesn't burn or stick to the bottom of the pan. Stir until thick and bubbly then stir for 2 minutes more.
Add a small amount of the hot mixture to the egg yolks and mix well. Add back into the main saucepan and mix it all together well. Once boiling, stir for 2 minutes longer. Once again you STIR, STIR, STIR, this can burn really easy so you have to be careful with it and keep stirring and don't set the heat on too high.
Now add the vanilla, and remove from the heat. Let cool. I like to eat mine hot so I don't put it in fridge like many recipes say to do. I just let it cool about 10 min so I don't burn my mouth and then I add the berries and eat it up.
1 2/3 c milk- I use skim
1/4 c sugar
4 tsp cornstarch
2 egg yolks lightly beaten
1 tsp vanilla
3 c berries (if frozen make sure they are thawed)
In a saucepan stir the milk, sugar, and cornstarch together. You have to keep a close eye on this and stir it continually so that it doesn't burn or stick to the bottom of the pan. Stir until thick and bubbly then stir for 2 minutes more.
Add a small amount of the hot mixture to the egg yolks and mix well. Add back into the main saucepan and mix it all together well. Once boiling, stir for 2 minutes longer. Once again you STIR, STIR, STIR, this can burn really easy so you have to be careful with it and keep stirring and don't set the heat on too high.
Now add the vanilla, and remove from the heat. Let cool. I like to eat mine hot so I don't put it in fridge like many recipes say to do. I just let it cool about 10 min so I don't burn my mouth and then I add the berries and eat it up.
I layer them together so it looks pretty. I do berries, then custard, then more berries, then more custard, and top with a few more berries. This is so yummy and is good if you are craving something sweet but not too sweet.
Eli loved it!
Saturday, March 10, 2012
Freezer meals made!
I now I have the following meals in my freezer and ready to go for after the baby gets here, so I can have a couple easy days of cooking.
Taco Meat (2 Bags)
Spaghetti Sauce
7 Layer Casserole
Beef and Noodles
Tuna Noodle Casserole
Baked Pasta
Ritz Chicken Casserole
Chicken Broccoli Bake
Chicken Casserole
Pot Roast seasoned and marinating
Grandma Rolls
Choc. Chip Cookies-dessert is a must have!
Plus a bag of frozen chicken and several pounds of ground beef to do something with at a later date.
We also still have some of the yummy soup left over to eat!
I think we are off to a good start, I may make some more later but that was enough cooking for one day for me!
Taco Meat (2 Bags)
Spaghetti Sauce
7 Layer Casserole
Beef and Noodles
Tuna Noodle Casserole
Baked Pasta
Ritz Chicken Casserole
Chicken Broccoli Bake
Chicken Casserole
Pot Roast seasoned and marinating
Grandma Rolls
Choc. Chip Cookies-dessert is a must have!
Plus a bag of frozen chicken and several pounds of ground beef to do something with at a later date.
We also still have some of the yummy soup left over to eat!
I think we are off to a good start, I may make some more later but that was enough cooking for one day for me!
Friday, March 9, 2012
Choc Chip Cookies
Choc. Chip Cookies:
Ingredients:
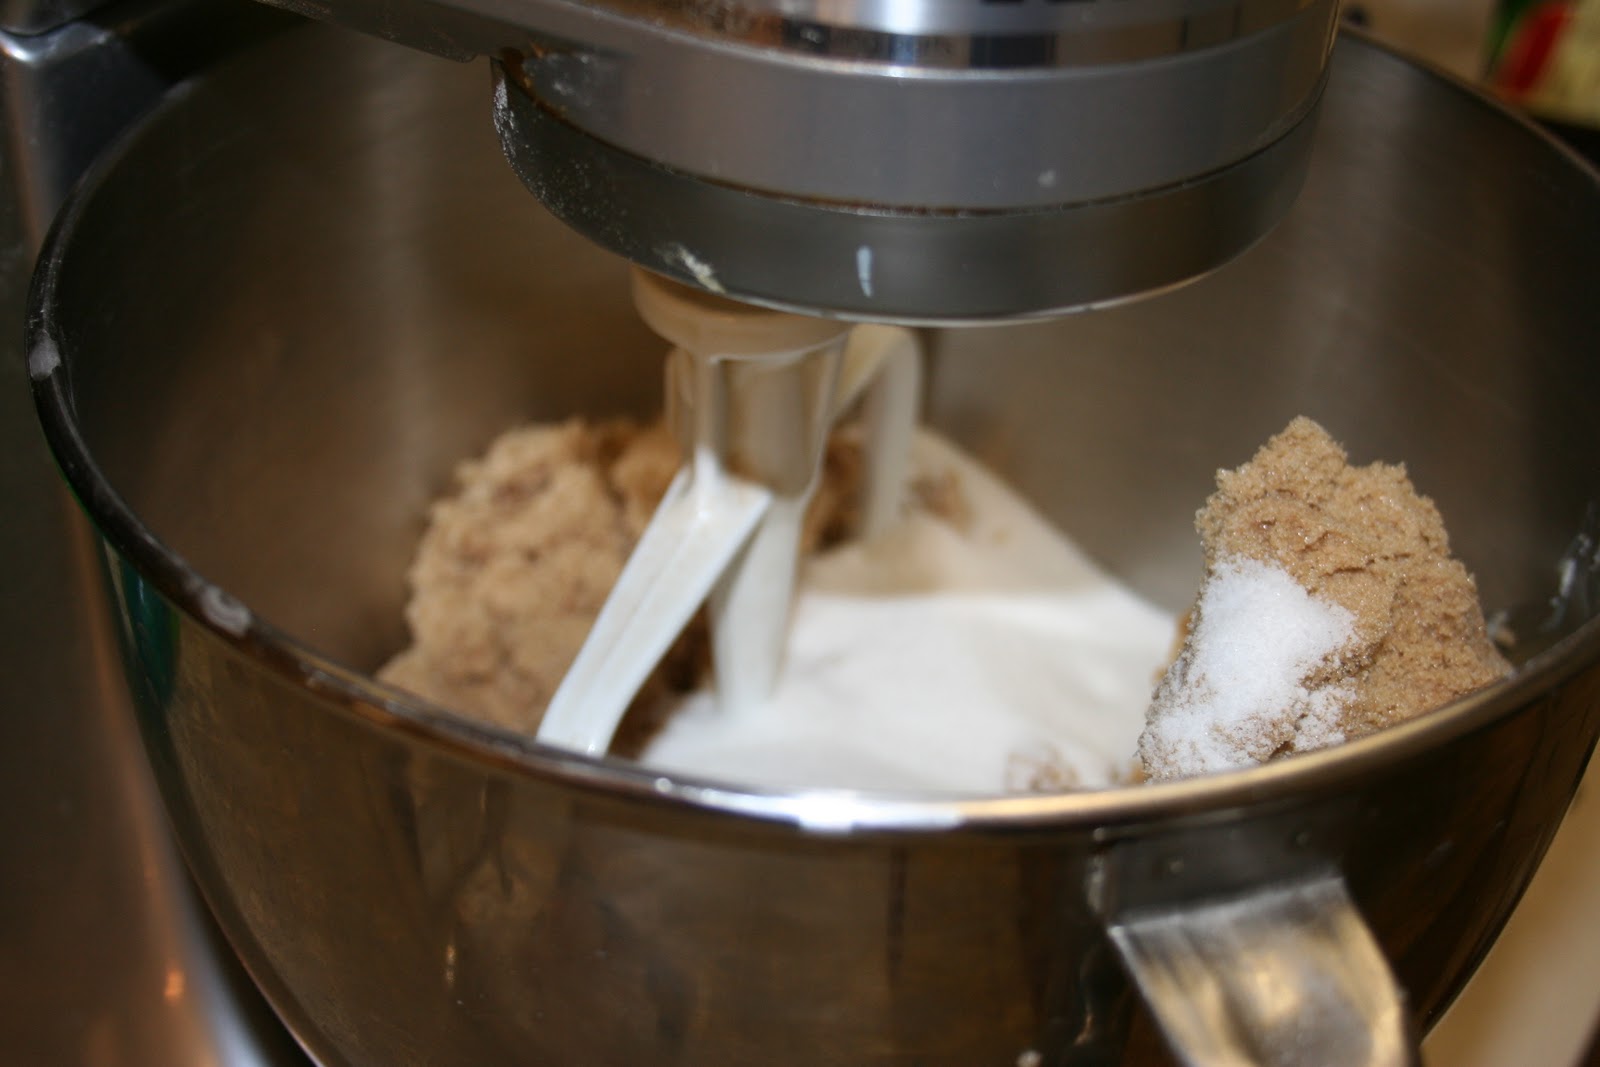
2 c Brown Sugar
1 c Sugar
1 c Butter
1 c Shortening
4 Eggs
2 tsp Vanilla
4 1/2 c Flour
2 tsp Baking Soda
2 c Choc Chips(or chips of your choice)
This makes about 10 dozen!
1. Beat the butter, shortening, and sugars together until light and fluffy.2. Add eggs and vanilla, mixing well between each egg. Stir in flour and baking soda.
3. Stir in the chocolate chips or the chips of your choice.
4. Spoon onto baking sheet or stone(I love to make cookies on my stone they always come out amazing)
5. Bake at 350 for 10-12 min or until golden brown.
All done, now I can't wait to eat them. I always just make one batch at a time. I leave some dough in the fridge, and then I put the rest of the dough in the freezer, so I can use it whenever I want. (especially since it will keep longer in the freezer!) When I freeze mine I usually put spoonfuls on a baking sheet and place in freezer until firm. I then transfer them to freezer bags, label and date. I have seen people use ice cube trays before for freezing and that is a great idea. I just don't have a dishwasher and I hate to wash ice cube trays, so the baking sheet is personally easier for me!
My little man helping me cook, what a big helper!
Sunday, February 26, 2012
Stuffed Animal Hammock-knit
I was looking for something to put all of Eli's stuffed animals in, since he has a ton of them and they seem to take over his crib. I liked the idea of the animal hammocks, but didn't want to buy one. I had some extra white yarn sitting around so I decided to get to work and make a pattern for one. So here it goes. This was his other b-day present-practical yes, but he needed it and I wanted an excuse to make it besides just because!
white yarn
Size 13 circle needles
CO2
Knit row
Increase in each st
Knit row
Increase in each st
Knit row
Increase in 1st and last st, knit all sts between
Knit row
Increase in 1st, 5th, and last st, knit all sts between
Knit row
Repeat the above two rows(instead of the 5th st always inc in the middle st of the row) until you have 80sts on needles.
Knit 20 rows
Now you are going to decrease in the same pattern, so it looks even so your decrease row should be:
k2 tog in 1st 2sts, middle 2sts, and last 2sts, knit all sts in between.
Knit row
Continue this until you have 10 sts left on your needles then do as follows:
K2 tog in 1st 2sts, knit and k2tog for last 2 sts
knit row
k2 tog for row
knit row
k2 tog for row
knit row
k2 tog
bind off stitches and leave a long tail so you can tie it all together and you will be able to hang it.
I finally decided to hang this in his closet, low enough so he could get to it, but so they were not just thrown in a pile in the closet!
white yarn
Size 13 circle needles
CO2
Knit row
Increase in each st
Knit row
Increase in each st
Knit row
Increase in 1st and last st, knit all sts between
Knit row
Increase in 1st, 5th, and last st, knit all sts between
Knit row
Repeat the above two rows(instead of the 5th st always inc in the middle st of the row) until you have 80sts on needles.
Knit 20 rows
Now you are going to decrease in the same pattern, so it looks even so your decrease row should be:
k2 tog in 1st 2sts, middle 2sts, and last 2sts, knit all sts in between.
Knit row
Continue this until you have 10 sts left on your needles then do as follows:
K2 tog in 1st 2sts, knit and k2tog for last 2 sts
knit row
k2 tog for row
knit row
k2 tog for row
knit row
k2 tog
bind off stitches and leave a long tail so you can tie it all together and you will be able to hang it.
I finally decided to hang this in his closet, low enough so he could get to it, but so they were not just thrown in a pile in the closet!
Saturday, February 25, 2012
Homemade Cough Syrup
Since I have been sick and being pregnant limits the things I can take-which I might add are all the things that actually work. I decided to do some research and come up with some cough medicine made of food so I can actually take it while pregnant. Because pregnancy and coughing don't go so well together. If you are not up peeing, you are up coughing, and if your coughing then you now probably have to pee. It is one vicious cycle!
I found this recipe and made a few changes to it:
1 c honey
1/4c warm water
3 TBSP lemon juice
1/4 tsp ginger
Take all these ingredients and mix them together. I found they separate slightly so it would be a good idea to put them in a jar or bottle so you can shake it before you take it. For an adult you take like 1-2 TBSP every 4-6 hrs, and then 1 TBSP if you are a child and 1/2 tsp if you are under 50lbs I think was the recommendation.
This has been the best thing in the past day for me. My throat has felt like it was on fire from all the talking I have to do(yes I really do have to talk-I have to call people into work!), and the coughing doesn't help that much either. I do not know how much it kept me from coughing but I was not coughing all day or all night like I have been the past two. In my opinion some relief is better than none. Also my sore throat, completely gone-I will continue to take it for this reason alone! I'm serious I can tell when it wears off because my throat starts burning. You take this stuff and within 20-30min relief! YEAH! I'm one happy momma now that I feel a little better, and I am so glad I found this recipe. Also it tastes really good because of all the honey in it, much better than any store bought brand I have ever had!
I found this recipe and made a few changes to it:
1 c honey
1/4c warm water
3 TBSP lemon juice
1/4 tsp ginger
Take all these ingredients and mix them together. I found they separate slightly so it would be a good idea to put them in a jar or bottle so you can shake it before you take it. For an adult you take like 1-2 TBSP every 4-6 hrs, and then 1 TBSP if you are a child and 1/2 tsp if you are under 50lbs I think was the recommendation.
This has been the best thing in the past day for me. My throat has felt like it was on fire from all the talking I have to do(yes I really do have to talk-I have to call people into work!), and the coughing doesn't help that much either. I do not know how much it kept me from coughing but I was not coughing all day or all night like I have been the past two. In my opinion some relief is better than none. Also my sore throat, completely gone-I will continue to take it for this reason alone! I'm serious I can tell when it wears off because my throat starts burning. You take this stuff and within 20-30min relief! YEAH! I'm one happy momma now that I feel a little better, and I am so glad I found this recipe. Also it tastes really good because of all the honey in it, much better than any store bought brand I have ever had!
Subscribe to:
Posts (Atom)