1.5yds of Red Felt (or color of your choice)
.5 yds of Black Felt
.25 yds of White Felt
First, I cut out the shape of the side of the train, I guessed with this as I only had a picture off the Internet to go by. I cut out two of these pieces. I then cut a long piece of felt 6" wide and about 32" long to attach to these as the middle piece. I also cut out all the wheels, I used one of the covers for my little man's bottles since they were bigger and a perfect circle. (I put 4 wheels on each side, so that was 16 circles that I cut out of the black felt). I also cut out some black pieces to attach the wheels to the train, I used the parts between the circles that were left on the felt.
Next comes the sewing and there is quite a bit of it just a heads up. I sewed two of each circle together, so I could lightly stuff them, so leave a small opening so you can add some stuffing. Once I filled them, I sewed up the last little bit by hand. If you are making a train you don't want them too big as trains don't really have thick wheels. If you are going to use this idea to make a car, then stuff them full and you may want to make the circles a bit bigger.
 For the main part of the train you are going to always keep the long piece straight, DON"T TURN IT, only turn the shape of the train. I started half way on the bottom of the train and started sewing. Now remember when you get the the corner, just move the foot of the sewing machine up and move just the shape of the train so that it lines up nice again. Below is a picture, but it is kind of hard to show in picture form.
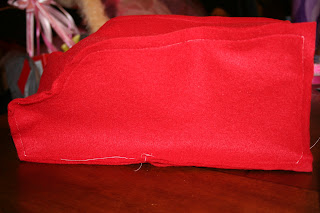
When you are all done with that one side the train should look like this. Now the middle, straight part looks funny but that is because it is standing up on it so you could see the train shape. Looks pretty good!
 Next, you are going to take the other side of the train and pin it to the straight piece. Make sure you line these up correctly or you will end up with a really funny looking train. The hardest part is probably making sure everything lines up good. Then sew that side. Oh I forgot to mention earlier I used 1/4 in seams, sorry about that. This is what it should look like when both sides are done!
Now if you notice at the bottom you should have a hole left where the two ends come together, this is intentional, as now we are going to stuff it, so it maintains the wonderful shape.
Before you stuff it tuck in those ends a bit so that when you sew it up it is a bit easier and you don't have to try and jam them in there with the stuffing. Just a hint!Now you are going to sew up that seam. I used black thread here, so you could see it a little bit easier.
You now have the base of your train all finished. So here comes the fun part, attaching all the decorations. Because this is a cute train, I made a face for it out of white and black felt pieces. I then also made the side decorations. (I put all of these on before attaching the wheels so I knew where to place the wheels). You can attach these by either hand sewing on all the pieces or you can hot glue them on. I used the hot glue, and then I put the wheels on by hand sewing because I wanted those to be a bit more secure.
Pretty cute huh?
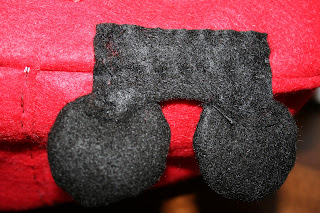
For the wheels, I first sewed the spacer(I don't know what to call the thing that connects the wheels together so we are going with that since it is an easy word) to one wheel and then to the other. Do this for all the wheels so you could have two wheels connected to each spacer. I then hand sewed them on to the train evenly spaced on each side so they matched.
I think it turned out quite nice for a first attempt at something like this. I was really pleased with the outcome and I think he was too.Here are both of the trains that I made, with the book that he got!


WIlliam loves it (and the other one), thank you so much!
ReplyDelete