Friday, March 30, 2012

Chair Cover

With everything getting moved around and being in a new place, my one cat gets finicky.  Needless to say how she usually repays us is by peeing on something.  So of course she picked my Ikea chair to pee on because we have one no where near us to be able to get a replacement cover at.
We decided to make one since we just finished the basement.  I really wanted some red down there, but not too much.  A chair cover was the perfect place to add some pops of red!

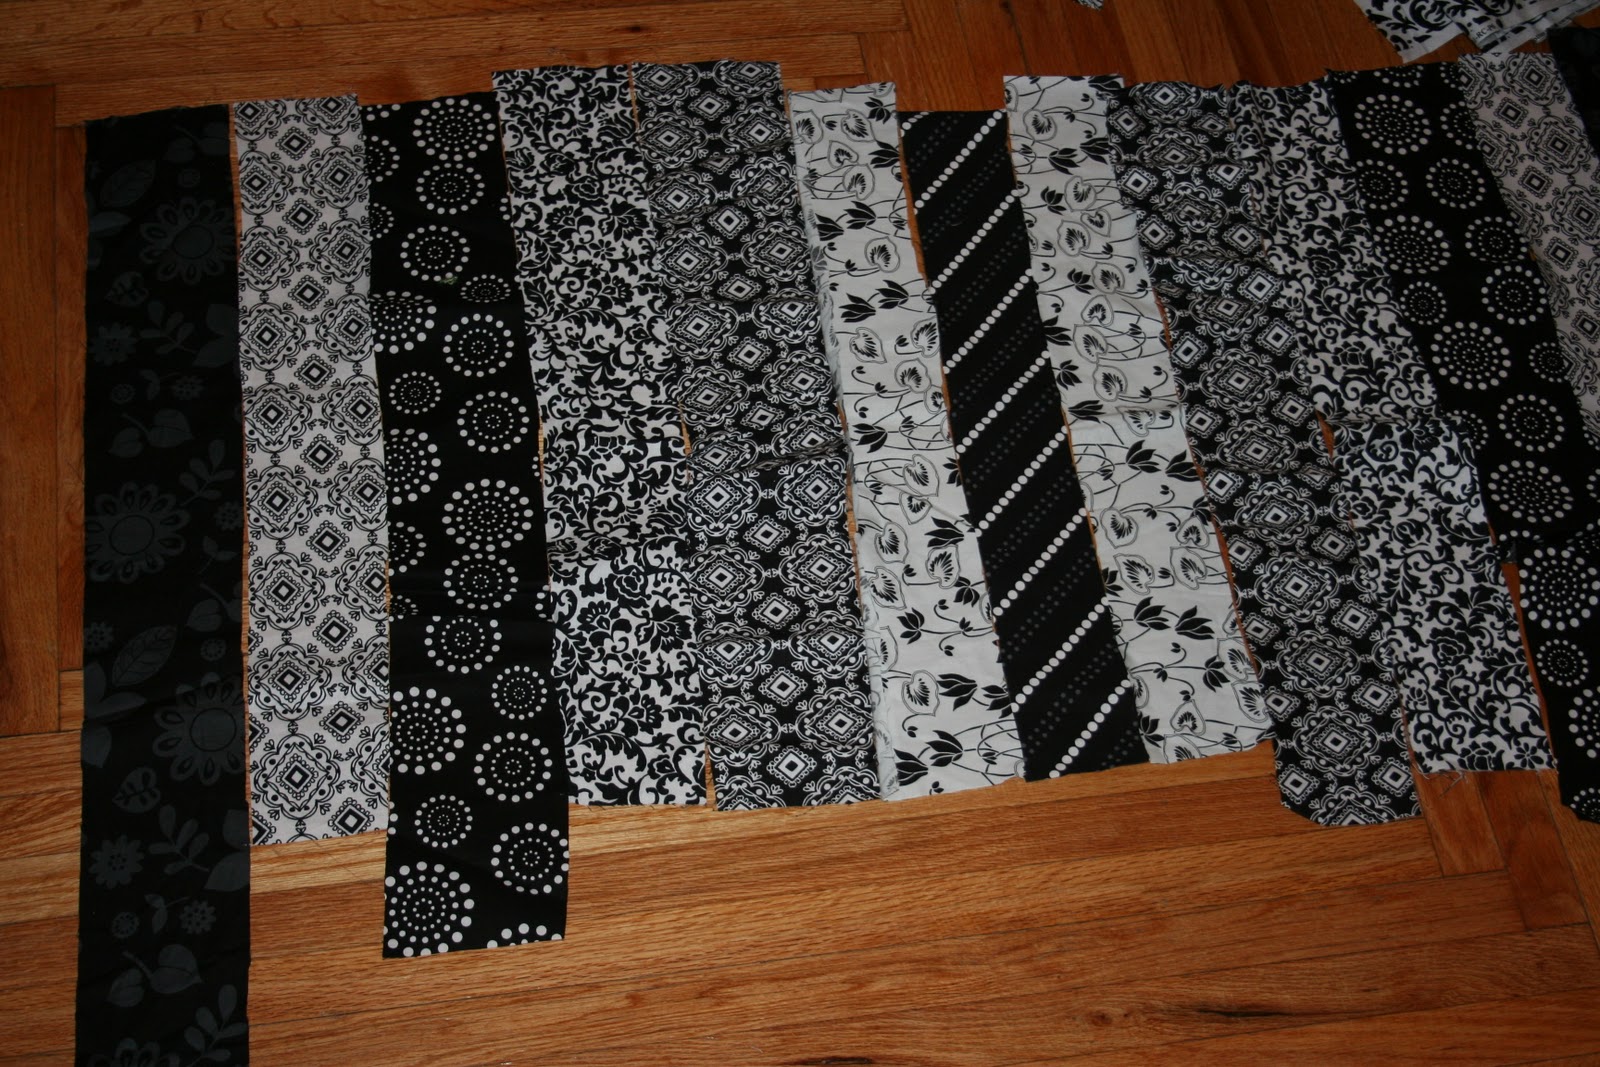
We found these super soft sheets on sale at Walmart and since a couple things needed recovering you will probably see this same design pop up in a lot of places.  But I like things to match so I have no problem with that!
I am not going to give you measurements because if you decide to recover something yourself it will probably be a different size.  This will just give you the basics on how to do it.
Part 1: Measure the top part (where your head rest).  Cut the fabric to that size(adding some for seam allowance).  I then had some old batting I put in there to make it fluffy since this is the head rest of the chair. Sew all this up making sure to sew the batting into the seams so that it stays and doesn't move around when you wash it.  Also make sure the right sides of the fabric are together and the batting is on one of the back sides.  I then place batting side down on the sewing machine so the needle doesn't get stuck in it.  I have some batting spray so I sprayed this on the fabric to make sure it sticks(it is like a glue for fabric and batting). Set this piece aside.

Part 2. I measured the second part of my cover, and cut that about 3 inches longer than needed.  I did these because I needed some room for seam allowance and also to sew the other two pieces to this one piece.  I then followed the same steps as above.  I placed the batting on one of the wrong sides and put the fabric right sides together.  Make sure you don't sew it all the way around so you have room to pull all the fabric through.  I left the whole bottom open as I was not quite sure how I was going to attach it to the other pieces yet, and needed to come up with a way to put the foam back into the chair.  I didn't really want to do a zipper not that it's hard I just didn't want to have to go and buy one, too cheap for that! 

Part 3: Same as the last 2 parts.  Measure and add room for seam allowance and some extra so you can attach it to the middle piece.  I added 2 inches to this one from the original measurement.

Part 4: Now we are going to attach all these pieces together and close up all those last seams.  I was still deciding how I wanted to do this in the process because I wanted to make sure I could remove the cover if it needed washing and then I wouldn't have to wash the foam pieces that go inside of it.

I attached them with some the top side of the fabrics sewn together-the parts that would be touching once on the chair.  I sewed this with about a 1 inch seam and I sewed about 1/4 of an inch in on either side just to make it lay flat and look nice.

Now all that is left is the back side of the chair cover which is left open.  I decided to put some snaps on this side so I can easily remove the cover if it needs washing.  So I attached three snaps-they are the hammer in kind and they work great! Last we stuff the foam back into the chair, and snap it closed and you are done!

It looks really nice and really adds a nice touch to the basement. The cat likes it:)

Tuesday, March 27, 2012

Kitchen-Finished

YEAH! All the trim in the whole kitchen is finally up.  The decorations are slowly coming together.  It really feels like home again. And it is all done just in time for our new little one to arrive.  I love the super wide baseboards. Thanks to a special friend at church for allowing us to use his saw, that was amazingly nice of you and we couldn't have done it without you!


Thank you to my mother and brother in law for coming out and helping us get things finished in there.  It was amazing to have your company and you were such a huge and wonderful help. 
Now we just need to figure out what we want to do with that back door.  We are having a dilemna-paint it white, strip and stain it to match all the new trim, or buy a new door when they go on sale.  I'm opting for the new door I believe.  It is kind of old and scratched up, we shall see what we come up with.

Monday, March 26, 2012

Happy Monday

It looks like it is going to be a beautiful week here in McPherson.  I'm really excited about that.  After almost a full week of rain I'm really excited for a full week of warm weather and sunshine.

We are hoping that baby girl makes her arrival this week sometime, wouldn't that be wonderful? Bed rest is getting a bit boring although now that my help is gone I usually only lay down when Eli is sleeping.  The rest of the time I get to take care of him, and play with him.  He has been a bit more clingy than normal lately, but I can't say that I mind.  It just means a lot of snuggles for mommy-which I am always ok with.

I hope everyone has an excellent week.  I know we are planning on it!

Thursday, March 22, 2012

Disposal Cleaner

I like my disposal to always smell clean, I mean come on who doesn't.  My disposal seems to get stinky quite often as we do a lot of dishes and a lot of extra food pieces go down the disposal.  I would often put half a lemon down the drain.  If I didn't have a lemon I would run some vinegar down the drain, and then clean the sink with some yummy smelling lemon cleaner.  This made me think surely there is an easy way to store a disposal cleaner premade!

Since I love both of these I decided to use them both.  I have heard before that it is good to run ice down the disposal to really clean the blades. (I'm not sure where I heard this, it could have been my dad-he always seemed to know everything about cleaning things and the right chemicals and mixtures to use to get the best results) So why not make some lemon/vinegar ice?

Here is what I used:
2 ice cube trays
2 c Vinegar
2 c Lemon Water -click here to see how I made it

Now just fill each ice cube tray up with half the vinegar and half the lemon water.  It smells wonderful going down the drain.  Both the lemon and vinegar have disinfecting agents, and both make the drain smell much better. Now place in the freezer.  Once frozen transfer to a freezer Ziploc bag, date and label (so you don't accidentally use for something else).  When needed pull out an ice cube and turn on the disposal.  Enjoy the cleaning effects and the smell. Also enjoy the fact that you didn't pour any harsh chemicals down your drain.

Sunday, March 18, 2012

Roasted Herb Chicken

Whole Chicken(mine was almost 3lbs)
1 tsp of all the following spices- basil, oregano, thyme, rosemary, sage, garlic powder and onion powder
2 TBSP olive oil
couple squirts of lemon juice

Place the whole chicken in a pan (I just used a baking dish because my roasting pan was was too big for a chicken this small).  Pour olive oil over top of the chicken and then squirt some of your lemon juice on top.  If using a real lemon use about 1/2 a lemon and squeeze the lemon on top of the chicken.  Mix all your spices together and sprinkle over top of the chicken.  Bake at 350 until inside measures 180 degrees.  I was always told that a good guide for roasting a whole chicken is to cook it for about 25min a pound. My chicken cooked for about 1 hr 15min and it came out good.

Note: usually when I make this chicken I like to stuff the inside with 1/2 an onion sliced into a couple pieces as it just helps to add some good flavor.  It tasted ok with the onion powder this time, as I didn't have an onion to use.

Once again no picture- I apologize we usually get so excited to eat it we end up just digging in!

Friday, March 16, 2012

Tub Cleaner

Alright so I am a bit skeptical of things at time, and this didn't really seem like any miracle cleaner to me, but decided what did it hurt to give it a try.

Oh my goodness, it is a miracle cleaner.  My cream tub has never looked so sparkly in my life!  I didn't take before/after pictures because I honestly didn't think it would work but it did, and now I'm sad I didn't take a before picture.

I found this off of pinterest so I can't take credit for it, but I just want you to know I am a firm believer in it and would recommend it to anyone!

Squirt Bottle
Dawn
Vinegar

Fill the squirt bottle with half Dawn and half vinegar.  I only filled the squirt bottle half way up because I had my doubts that it would work.  I sprayed it all over the shower, and I let it set for a bit.  Mainly because I'm not really supposed to be doing work around the house but can't stand the thought of sitting still so I just do one thing and then sit, and then do another thing and then sit some more.

So after I sat for about an hour, I went back to the tub for scrubbing.  I could seriously see the soap scum coming off the tub as I was scrubbing.  I had no idea my tub was that dirty.  YUCK!  It's all better now though and looks amazing.  Once you have it all scrubbed(it will be quite bubbly as it has Dawn in it), then you rinse everything down.  Now I can't wait to take a shower in my nice clean tub!

This is seriously way cheaper than buying scrubbing bubbles and works so much better than any other tub cleaner I have ever used, as I have tried a lot to get the hard water off the tub and the soap scum but never quite seem to succeed.  Seriously try this, you will be so glad that you did!!

Coffee Sign

For those of you who know me quite well you know that I love coffee.  I worked in a coffee shop for 5 years and loved it, but I also grew up around it.  My parents and grandparents were always drinking coffee, I think it has become more of a comfort item then a necessity.  When I was pregnant with Elijah I couldn't drink coffee for the first 3 months because it made me nauseous, and then all the sudden one day I craved it, and yeah I was able to drink it again.

Any way, now that my kitchen is done I am going to keep the coffee theme going in there.  Since I changed the colors though I need some new decorations.  Since I would prefer to make something cool, then go buy something really expensive I came up with this idea!

What you will need:
Canvas
Old Floor Tiles(mine were peel n stick vinyl so they were not too heavy)
coffee filters
Hot glue gun/glue

First, on my canvas I laid out all the scraps of tile that I had left from putting the flooring in.  I didn't really want any of them to go to waste, and they made a nice background and obviously matched the kitchen.

Next, I went to town scrunching up all the coffee filters, so they looked pretty.  I found for this project it worked better if I cut them in half since I was going to be writting out of them.  The full coffee filters were a bit too big.

Then, I set to work spelling out coffee on the tile with the hot glue gun(I only did one letter or half a letter at a time so it wouldn't dry), then I placed the coffee filters on it.

On the bottom underneath the word coffee I put a coffee cup.  I centered it under the "f" so that it looked like the fs were more of the steam coming out of the cup of coffee.


Now since I already had the tile(as it was scraps), I already had the canvas(it came in a two pack and I had already used the other one for a different project), the only thing I needed to buy were coffee filters(since my coffee pot has a reusable one).  Which means I made this project for a total of 1.50-can't beat that in my book and I really like the way it turned out.  This will look wonderful above my arch in the kitchen!

Wednesday, March 14, 2012

Update

I have been in the hospital since Sunday.  I was in active labor but since I was only 35wks they have tried to stop it.  The transfered me to a hospital in wichita and here I sit and sit and wait.  I am not complaining though it has been a nice break from life in general.  I get waited on(who doesn't like that), I am given Benadryl and tylenol every 4-6 hrs(keeps me out of pain and extra sleepy).  I think maybe they could sense I am an antsy person and needed some extra help to sleep all the time.  It has kept me sleeping most of the night and I take a couple naps a day. Which never happens while at home since I have a 13mo old little man to take care of.

Good news is they are thinking about letting me go home today.  I do hope that happens as it gets rather boring.  I have spent my time reading, knitting, catching up on some posts I wanted to get on here, and just plain relaxing.  This has been a great mini-vacation and definitely a much needed one since I will have two little ones to chase around all day here soon.

We will see how long this lasts, and however long it does I am determined to make the best of it and soak it all in.  Because I know once they let me go home no matter how hard I try I am not going to be able to sit still, it just isn't in my nature!

Pacifier Carrier

I cut a piece of fabric 5"x10.5 " I measured this along the fold of the fabric, so the actual size would be twice this length.  I then folded it so that right sides were together.  Sew this up, but leave one of the short sides open so you can pull the fabric through so it is the right way!
Let's make the strap now before we sew up the next part of the bag! To do this cut a strip a fabric that is 2"x7" fold it in half(with right sides together) so it is 1"x7", sew up one short side and the long side.  Now push this so that it is right side out, and you have a strap.  I cut this in half and used half for the diaper bag strap and one for the paci strap.

Now fold that piece in half, and tuck in the strap that you made so you can attach it to another bag (in my case to the small diaper bag). Make sure you put this strap in one of the top corners that you are going to sew up! Sew up the two side seams.  This will tuck in your rough end that you left.

 I made it big enough to fit a soothie since those seem to be the biggest pacifiers!
Now you attach the snap to the bag.  I bought the kind that you hammer in and they seem to work really well and it doesn't take much time to do. I also attached one half of the snap to the paci holder and the other side of the snap to the diaper bag, so they can be easily moved together!

 Matching pacifier holders!
Everything matches! Makes me a happy momma!

Tuesday, March 13, 2012

Diaper bag-small

With another baby on the way, I decided to make a small diaper bag-big enough to hold a few diapers and wipes.  That way I can put both of the bags in one big diaper bag and I don't have to carry around two big bags.  Especially since they will be in different classrooms but Eli won't need much more than diapers and wipes, and the baby will need more stuff.

Here is the pattern:
First cut the fabric so that it measures 10" x 22". This was cut along the natural fold in the fabric so it is actually twice this size (just a side note).


Now fold it so the right sides are together and sew up the sides.  Remember to leave an opening so that you can pull the fabric right side out.  I left like a 3" hole so it was a bit easier to turn it the right way.

Iron so that it lays flat. You don't want any air in it or it won't fit in a small space, which is what we want.
Tuck in the raw edges that are left on the one side(you don't need to sew them up).  We are going to make a small strap to attach to the bag, so it can be attached to something such as the pacifier carrier.

To make the strap:
Cut fabric 7" long by 2" wide.  Fold in half right sides together and sew up the sides, leave one of the short sides open so you can pull the fabric right side out through this hole.  You may need to use a long stick, I used a knitting needle to help push the fabric through the hole.  Now you are going to cut this in half, so you have a piece that's 3" long. Now you have two to use, we will use the other one in a different tutorial.


Back to the main bag:
Now you are going to fold it in half again so that it makes a rectangle.  Place on of the staps on a top corner of the bag, lay it on the inside so it will end up on the outside of the bag.

Sew up the two side seam, your raw edge should be in these side seams. Turn right side out, and guess what you're almost done.

I then put a snap on the top middle of the bag (I bought the kind you hammer into place, really quick and easy to use and not too expensive).  I then put half of one snap on the middle of the strap.(I put the other one on the pacifier carrier strap so I can attach them together.) It turned out quite nice!

 Diaper bags with matching pacifier carriers, one for Eli and one for the baby girl!

Sunday, March 11, 2012

Berry Custard Recipe

Ingredients:
1 2/3 c milk- I use skim
1/4 c sugar
4 tsp cornstarch
2 egg yolks lightly beaten
1 tsp vanilla
3 c berries (if frozen make sure they are thawed)

In a saucepan stir the milk, sugar, and cornstarch together.  You have to keep a close eye on this and stir it continually so that it doesn't burn or stick to the bottom of the pan. Stir until thick and bubbly then stir for 2 minutes more.
Add a small amount of the hot mixture to the egg yolks and mix well.  Add back into the main saucepan and mix it all together well.  Once boiling, stir for 2 minutes longer.  Once again you STIR, STIR, STIR, this can burn really easy so you have to be careful with it and keep stirring and don't set the heat on too high.
Now add the vanilla, and remove from the heat.  Let cool.  I like to eat mine hot so I don't put it in fridge like many recipes say to do.  I just let it cool about 10 min so I don't burn my mouth and then I add the berries and eat it up.

I layer them together so it looks pretty.  I do berries, then custard, then more berries, then more custard, and top with a few more berries.  This is so yummy and is good if you are craving something sweet but not too sweet.
Eli loved it!

Saturday, March 10, 2012

Freezer meals made!

I now I have the following meals in my freezer and ready to go for after the baby gets here, so I can have a couple easy days of cooking.

Taco Meat (2 Bags)
Spaghetti Sauce
7 Layer Casserole
Beef and Noodles
Tuna Noodle Casserole
Baked Pasta
Ritz Chicken Casserole
Chicken Broccoli Bake
Chicken Casserole
Pot Roast seasoned and marinating
Grandma Rolls
Choc. Chip Cookies-dessert is a must have!
Plus a bag of frozen chicken and several pounds of ground beef to do something with at a later date.
We also still have some of the yummy soup left over to eat!

I think we are off to a good start, I may make some more later but that was enough cooking for one day for me!

Friday, March 9, 2012

Choc Chip Cookies

Choc. Chip Cookies:

Ingredients:
2 c Brown Sugar
1 c Sugar
1 c Butter
1 c Shortening
4 Eggs
2 tsp Vanilla
4 1/2 c Flour
2 tsp Baking Soda
2 c Choc Chips(or chips of your choice)
This makes about 10 dozen!
1. Beat the butter, shortening, and sugars together until light and fluffy.
2. Add eggs and vanilla, mixing well between each egg. Stir in flour and baking soda.
3. Stir in the chocolate chips or the chips of your choice.
4. Spoon onto baking sheet or stone(I love to make cookies on my stone they always come out amazing)
5. Bake at 350 for 10-12 min or until golden brown.

All done, now I can't wait to eat them.  I always just make one batch at a time.  I leave some dough in the fridge, and then I put the rest of the dough in the freezer, so I can use it whenever I want. (especially since it will keep longer in the freezer!)  When I freeze mine I usually put spoonfuls on a baking sheet and place in freezer until firm.  I then transfer them to freezer bags, label and date.  I have seen people use ice cube trays before for freezing and that is a great idea.  I just don't have a dishwasher and I hate to wash ice cube trays, so the baking sheet is personally easier for me!
My little man helping me cook, what a big helper!

Thursday, March 8, 2012

Strawberry Muffin Recipe

This recipe is from my wonderful mother in law, and let me tell you what these are some of the best muffins you will ever eat! They are even more delicious if you add the cinnamon butter with them. Now onto the recipe.


Ingredients:
3 cups all purpose flour
2 cups sugar
1 Tablespoon ground cinnamon
1 teaspoon baking soda
1 teaspoon salt
2 cups strawberries
1 cup vegetable oil
3 eggs beaten
1/4 to 1/2 teaspoon red food coloring (optional)
1-1/2 cups pecans (optional)

Fold all the wet ingredients into the dry. I add my strawberries last so all the other ingredients get mixed together really well first.  Place in muffin tins 3/4 full.  I always fill mine almost to the top.  Not quite sure why but that is just the way I have always done it. Bake at 375 for 15-18 min.


Side note: This makes 2 1/2 dozen and my family does not need that many muffins at a time.  I found out these freeze quite well.  The have these wonderful foil muffin liners at Walmart and they are made so you don't have to use a muffin pan to bake the muffins in.  I make a dozen to eat immediately.  I then place the rest of the batter in these wonderful little tins.  Lay them flat in the freezer, until they have maintained their shape.  I then move them to freezer bags, label and date.  Now I have muffins I can pull out whenever I want!

Cinnamon Honey Butter
1/2 cup butter
1 cup confectioner's sugar

1/4 c honey
1/4 tsp ground cinnamon

Mix all these ingredients together and enjoy on top of the warm muffins.  I'm telling you, you may just think you died and went to heaven when you eat these muffins!

Tuesday, March 6, 2012

Storage Room

Our storage room has been an absolute disaster(that is an understatement by the way) for over a year.  We kind of threw everything back there while we tried to get the main room done.  Needless to say it was very difficult to sort through things and try to find stuff when we needed it, and I always dreaded having to go in there.

This weekend we spent our time down there.  We pulled every last box out of that room and went through it.  Man did that feel good.

Our dumpster outside is now full and they don't pick it up until Friday morning.  We got 4 garbage bags of junk out of there, emptied 10ish cardboard boxes that we can now throw away.  We also managed to empty 3 containers-which we can put to use for baby clothes as this one grows out of them.

All in all a very productive weekend.  This also helped clean out the main room a bit.  We started organizing some things in there, but are still working on it.

Sorry I should have taken before and after pictures so you could see how far it really came.  The transformation is truly amazing. And both hubby and I are so excited to have so much junk gone.  Although not all the junk is gone.  My faithful hubby looked up everything and I mean everything, that we were going to throw away and if we could even make $2 on it, he listed it on Amazon or Craigs list.  We shall see if any of it sells!

Well that was our weekend-how was yours??

Monday, March 5, 2012

Basement Finished!

This is it! The time I have been waiting for for over a year.  My basement is finished(well as finished as it is going to get for quite some time).  My husband was so wonderful and finished all of the mudding and sanding, so this past weekend we could get to work on priming and painting.

So first up priming.  All done! Yeah.


Next we painted.  I forgot to take a pic before we started pulling everything out of storage so don't mind the messy room.  Can I just say also this picture does it no justice because the lighting down there is awful.  The color is a pale yellow/cream and really brightens up the room a ton!


Next up is trying to figure out where all the furniture is going to go.  I think we have rearranged it about 8 times now (yes in one day).  I think in the above picture is probably how it is going to stay.  This step was much harder than either of us ever imagined.  We have big chairs that we love, and we wanted to keep it looking open so that our young ones would have plenty of space to run around in.  I think we achieved that look, at least for now!

I couldn't be more excited, my house is truly coming together, and just in time.  We have less than 5 weeks until the baby arrives!  We scheduled our C-section last week and so as long as she doesn't make an early appearance she will be here on 4/6 early in the morning! Now who wants to come help me teach the little man to walk by then??

Sunday, March 4, 2012

Quilted skirt-Adult

Fabric Strips: 3"x21"
Bottom wide piece:11.5"x(1.5x your waist measurement)
Bottom Skinny Piece: 3"x(1.5x your waist measurement)
Waistband" 2"x(how ever big your waist is)
Elastic: I used 1/2" and then 2" less than my waist measurement.

I decided to make this skirt because I had a lot of leftover black and white fabric but not enough of any of it to make a skirt for myself.  Soo I decided I would give it a quilted look and piece them all together.

To start out I cut out all my strips of fabric. I needed 15 strips.
I had a very good helper!

Next, I placed them all out to make sure that they looked evenly spaced with not too much black background in a row. I know they are not all the same length. I cut them all even later(I just started with the length that I had of each fabric to see how long I could get it)

Now you set to work on sewing all these strips together. I used 1/4" seam allowance on these.


 So now you should have what looks like a block of fabric. Make sure it will be wide enough to fit all the way around you! I trimmed the edges all even after I had all the pieces attached.

I then took the pieces I had cut out for the bottom pieces of the skirt and I gathered them at the top click here if you need directions on how to do this.  I then sewed both of these pieces together to make the full bottom.

Take your bottom piece and sew it to your block of fabric scraps, make sure you do this with the right sides together so that you get a nice clean seam.  Also sew it right above the gathered stitch so that the messiness of it is covered.


Now for the waistband.  Take your elastic and put it in your waistband.  I did this by adding it before I put the waistband on the skirt.  Make sure the elastic is 2" shorter than the fabric so that it will hold it better. 
To insert the elastic waistband, fold the top part of the skirt over, and tuck in the bottom so you have a nice clean edge. Now sew up the side.  Make sure you pull on the elastic as you go, so that it will bounce back into place when it is finished. (I forgot to take pictures of this step I'm so sorry and this is a complicated piece to explain)

Once your waistband is made, attach it to the rest of the skirt.  Make sure when you attach it the elastic is at the top and that you sew it with right sides together, this just always keeps everything looking neat and tidy!Turn the fabric so it is right sides together and sew up the side seams.  This will make it a circle.  You are done. Enjoy!